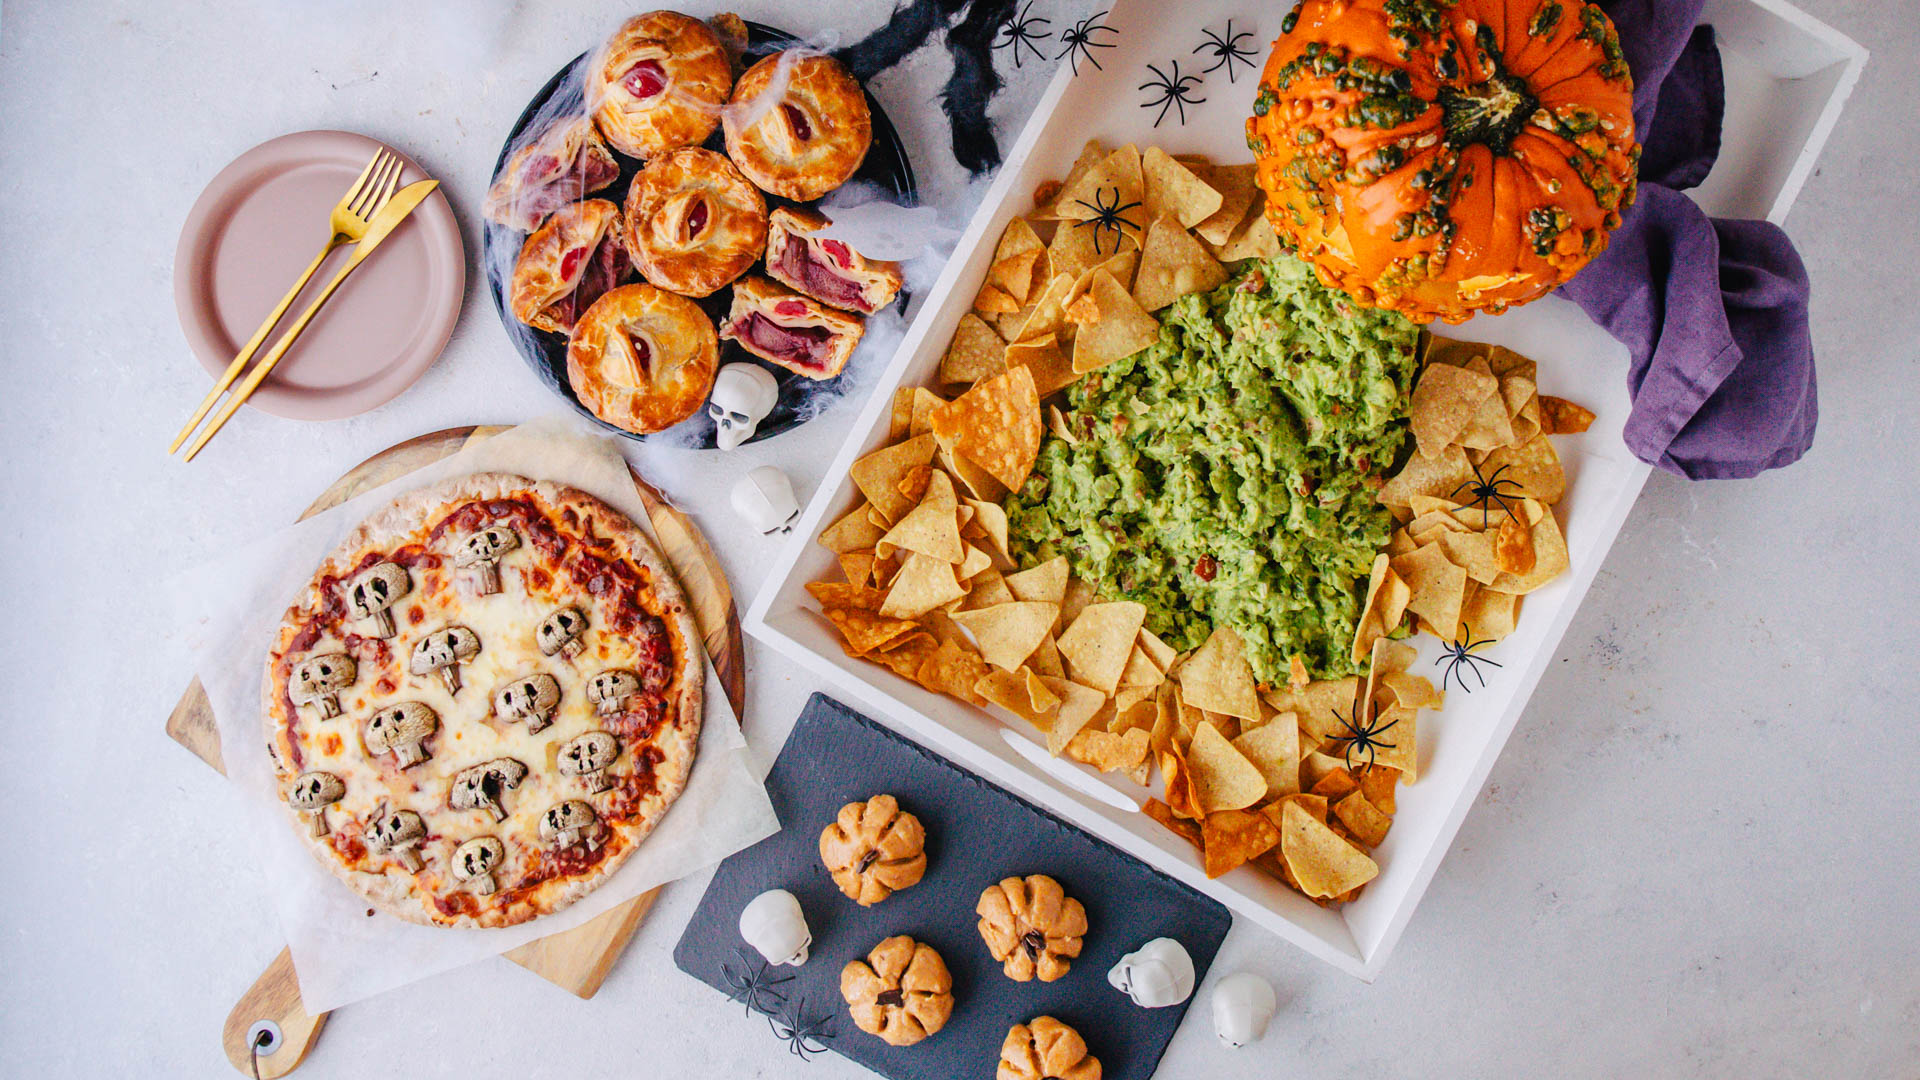
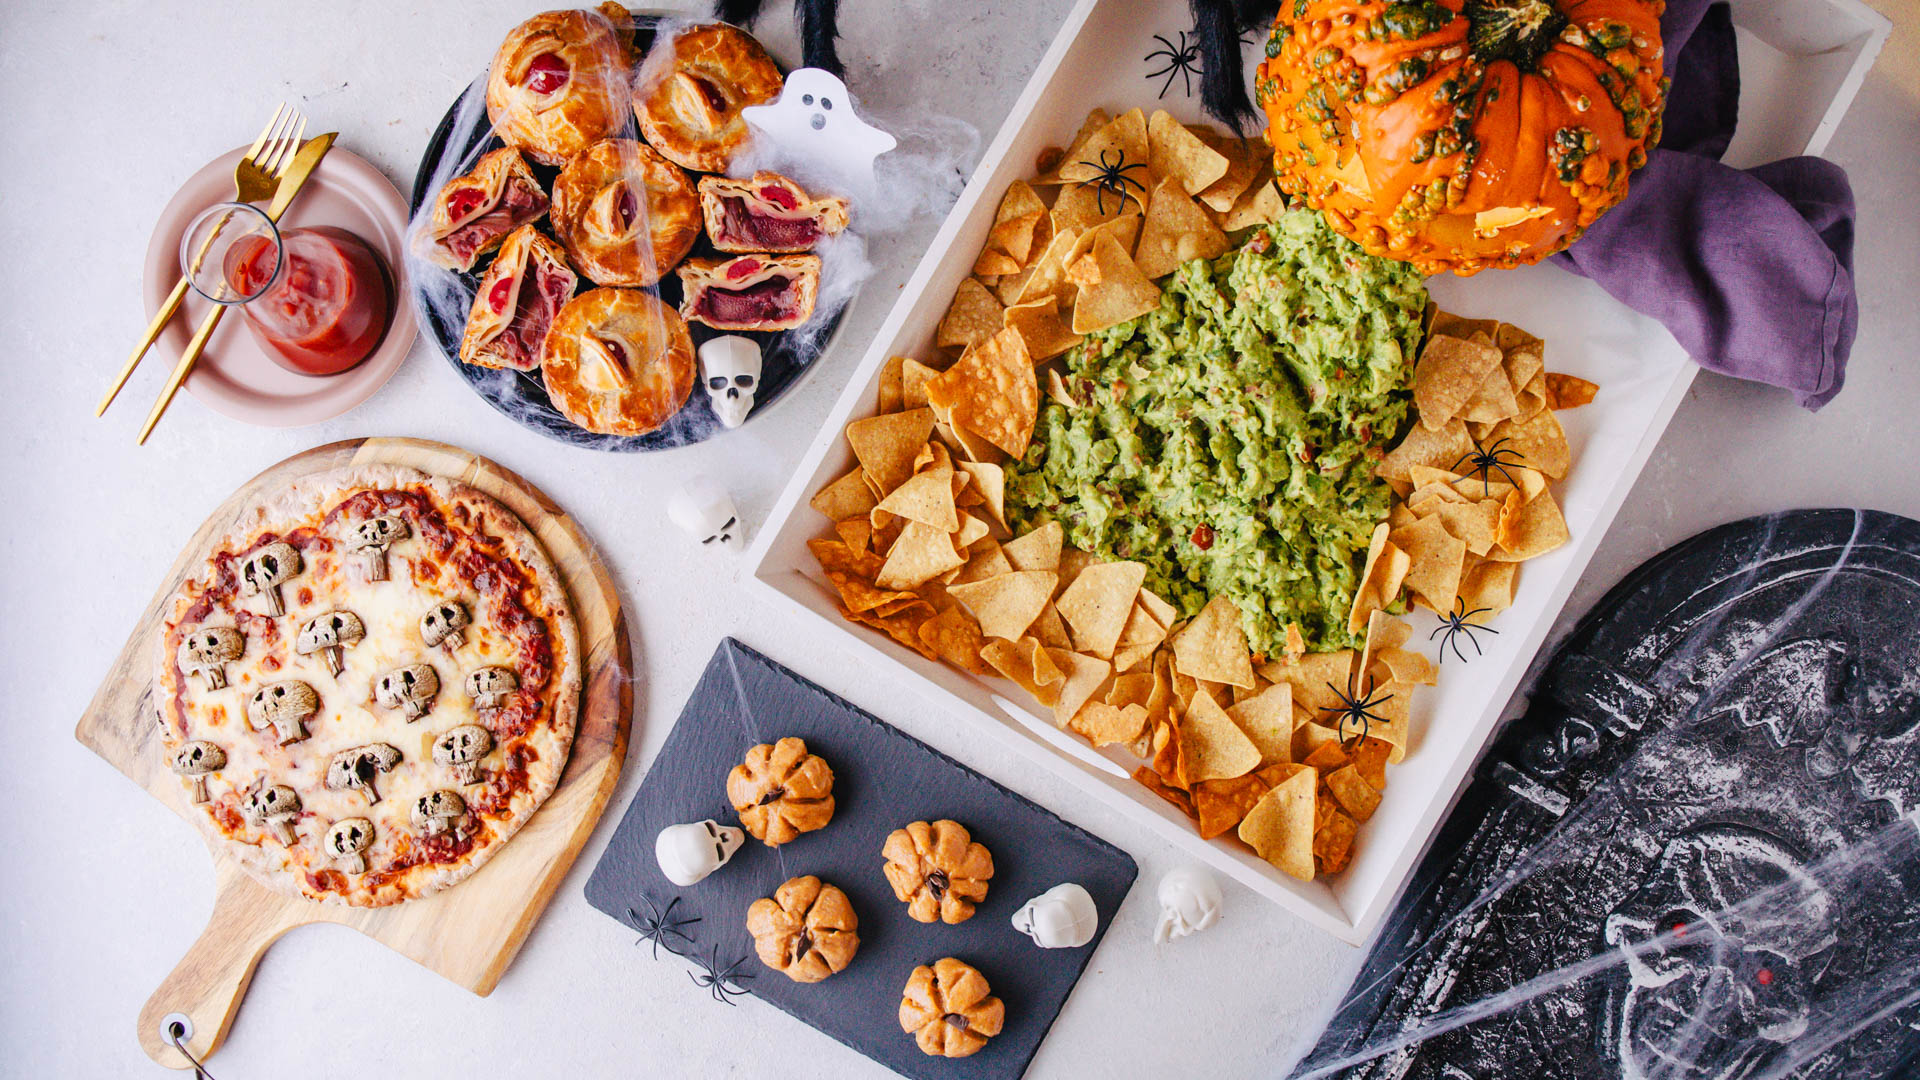
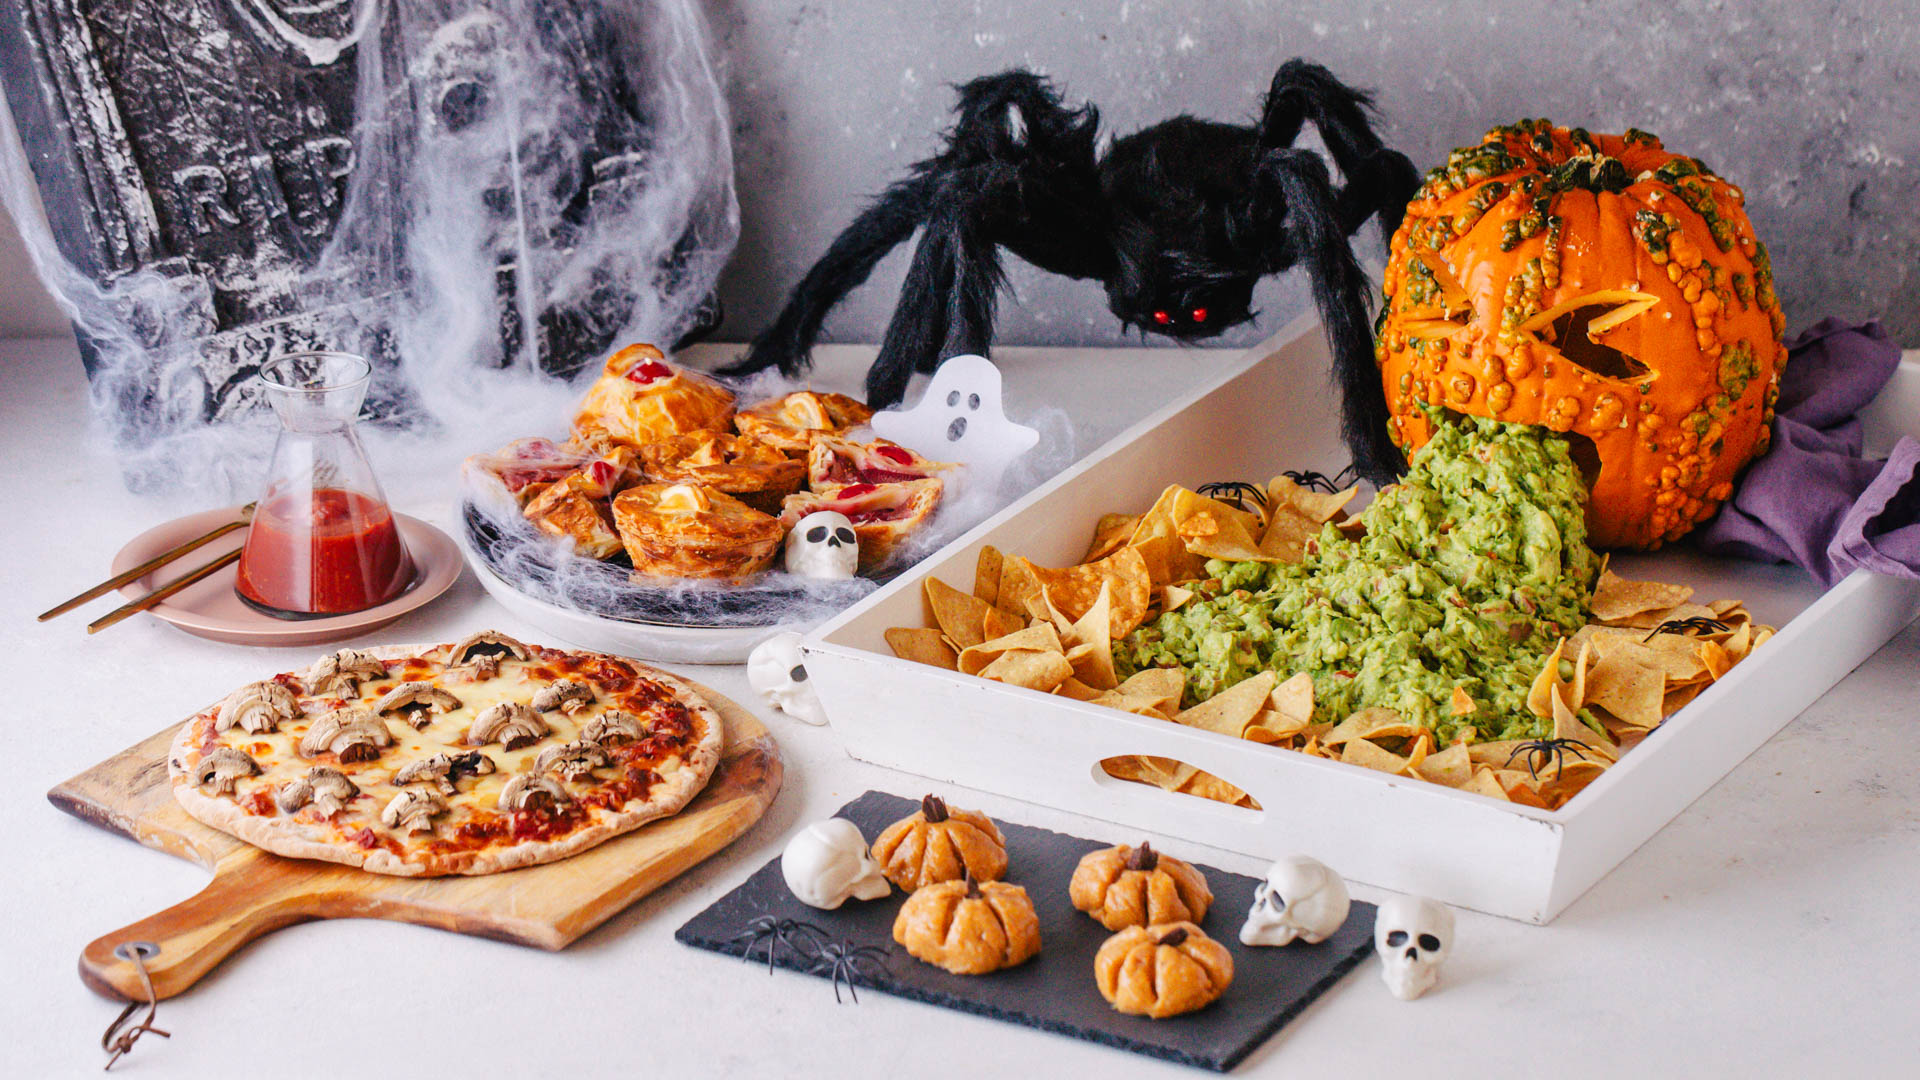
Spooktacular Feast!
Looking to throw a wickedly fun Halloween party that will leave your guests both spooked and stuffed? These eerie-looking recipes are not only a feast for the eyes, but are also ghoulishly delicious!
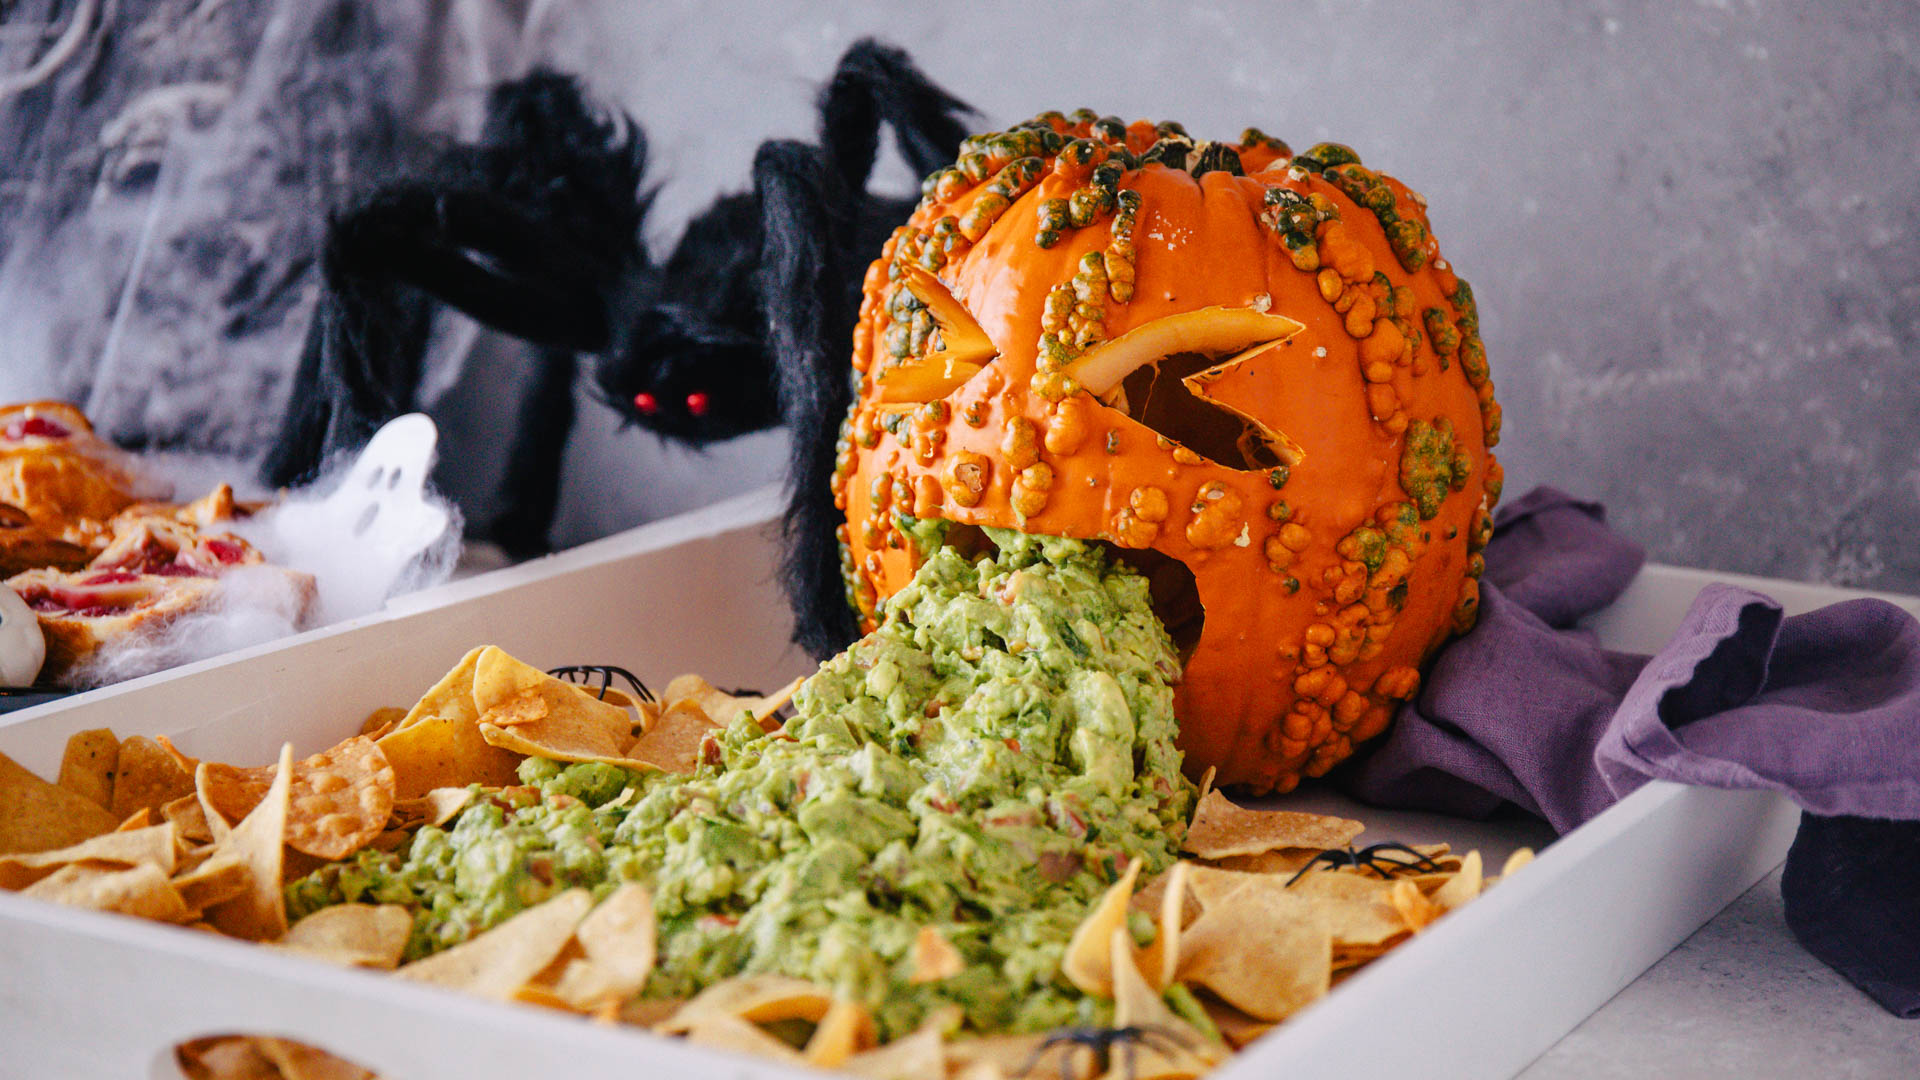
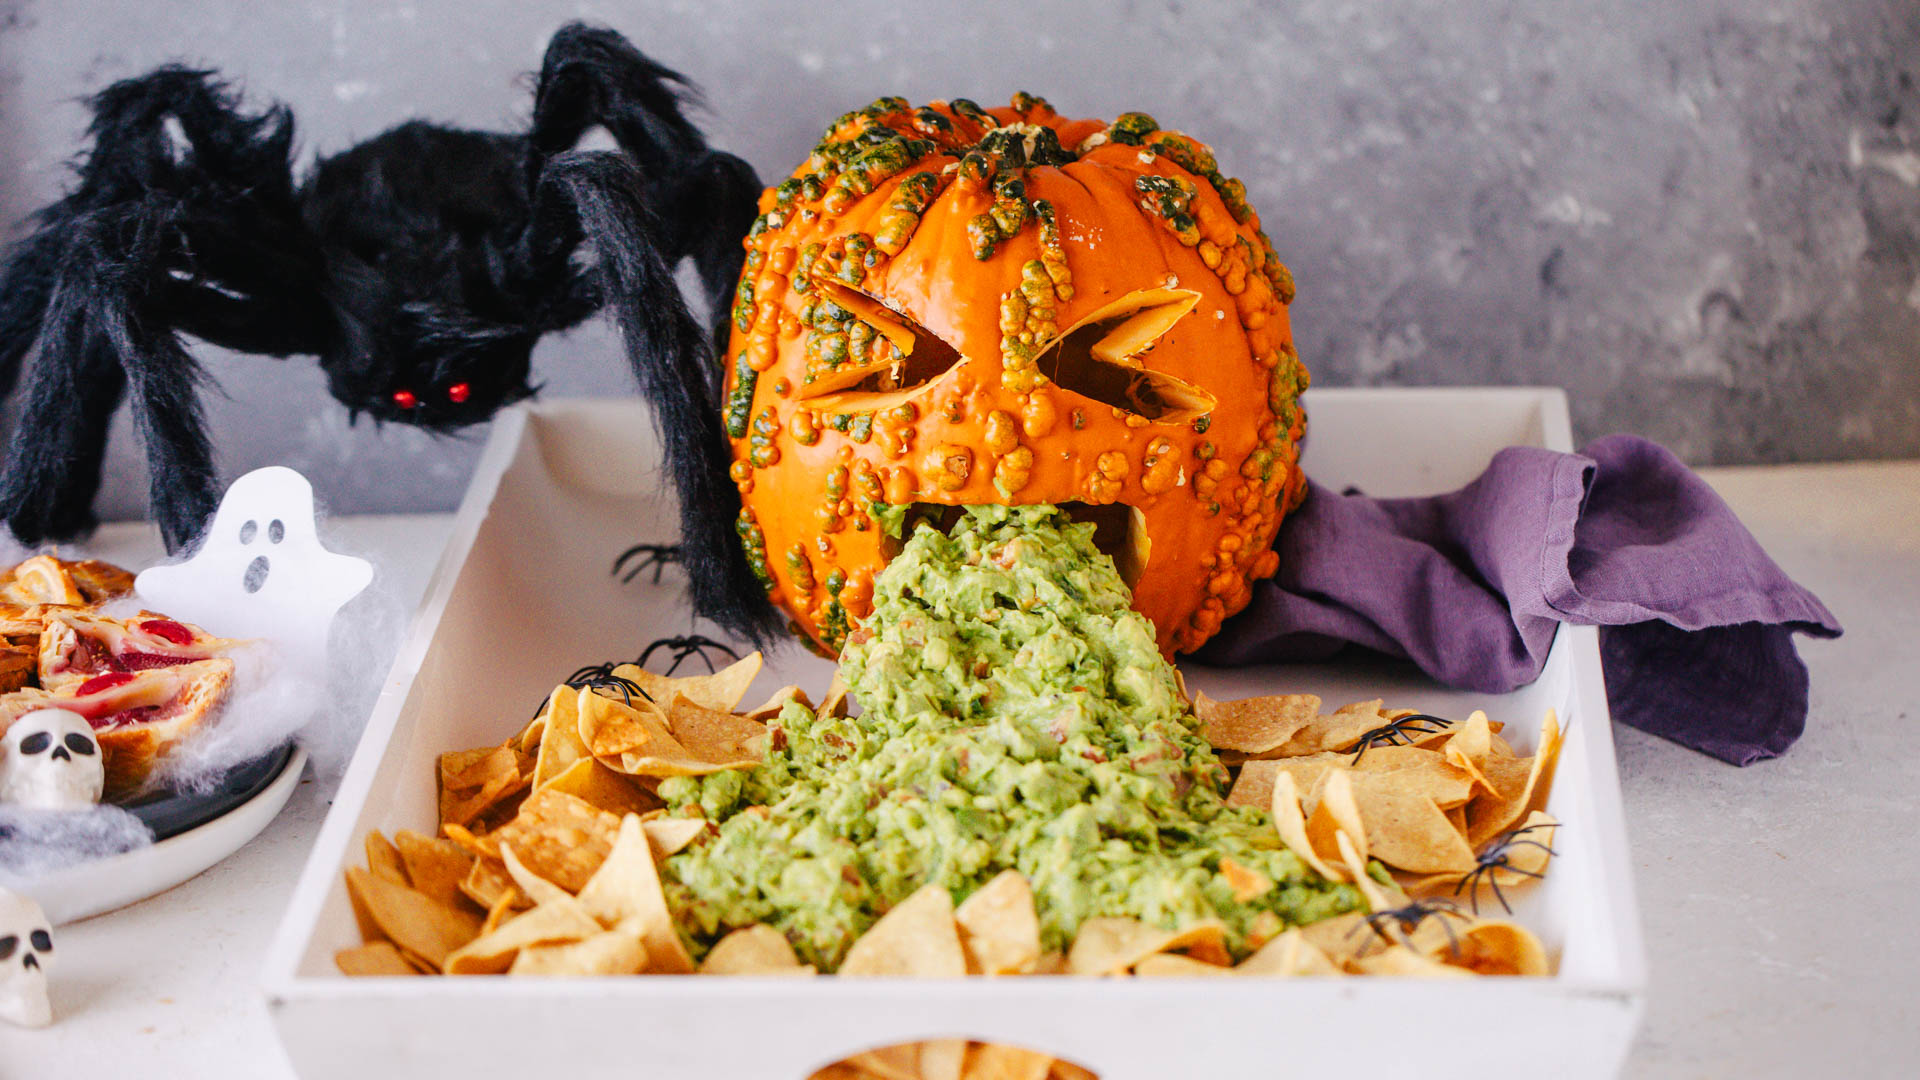
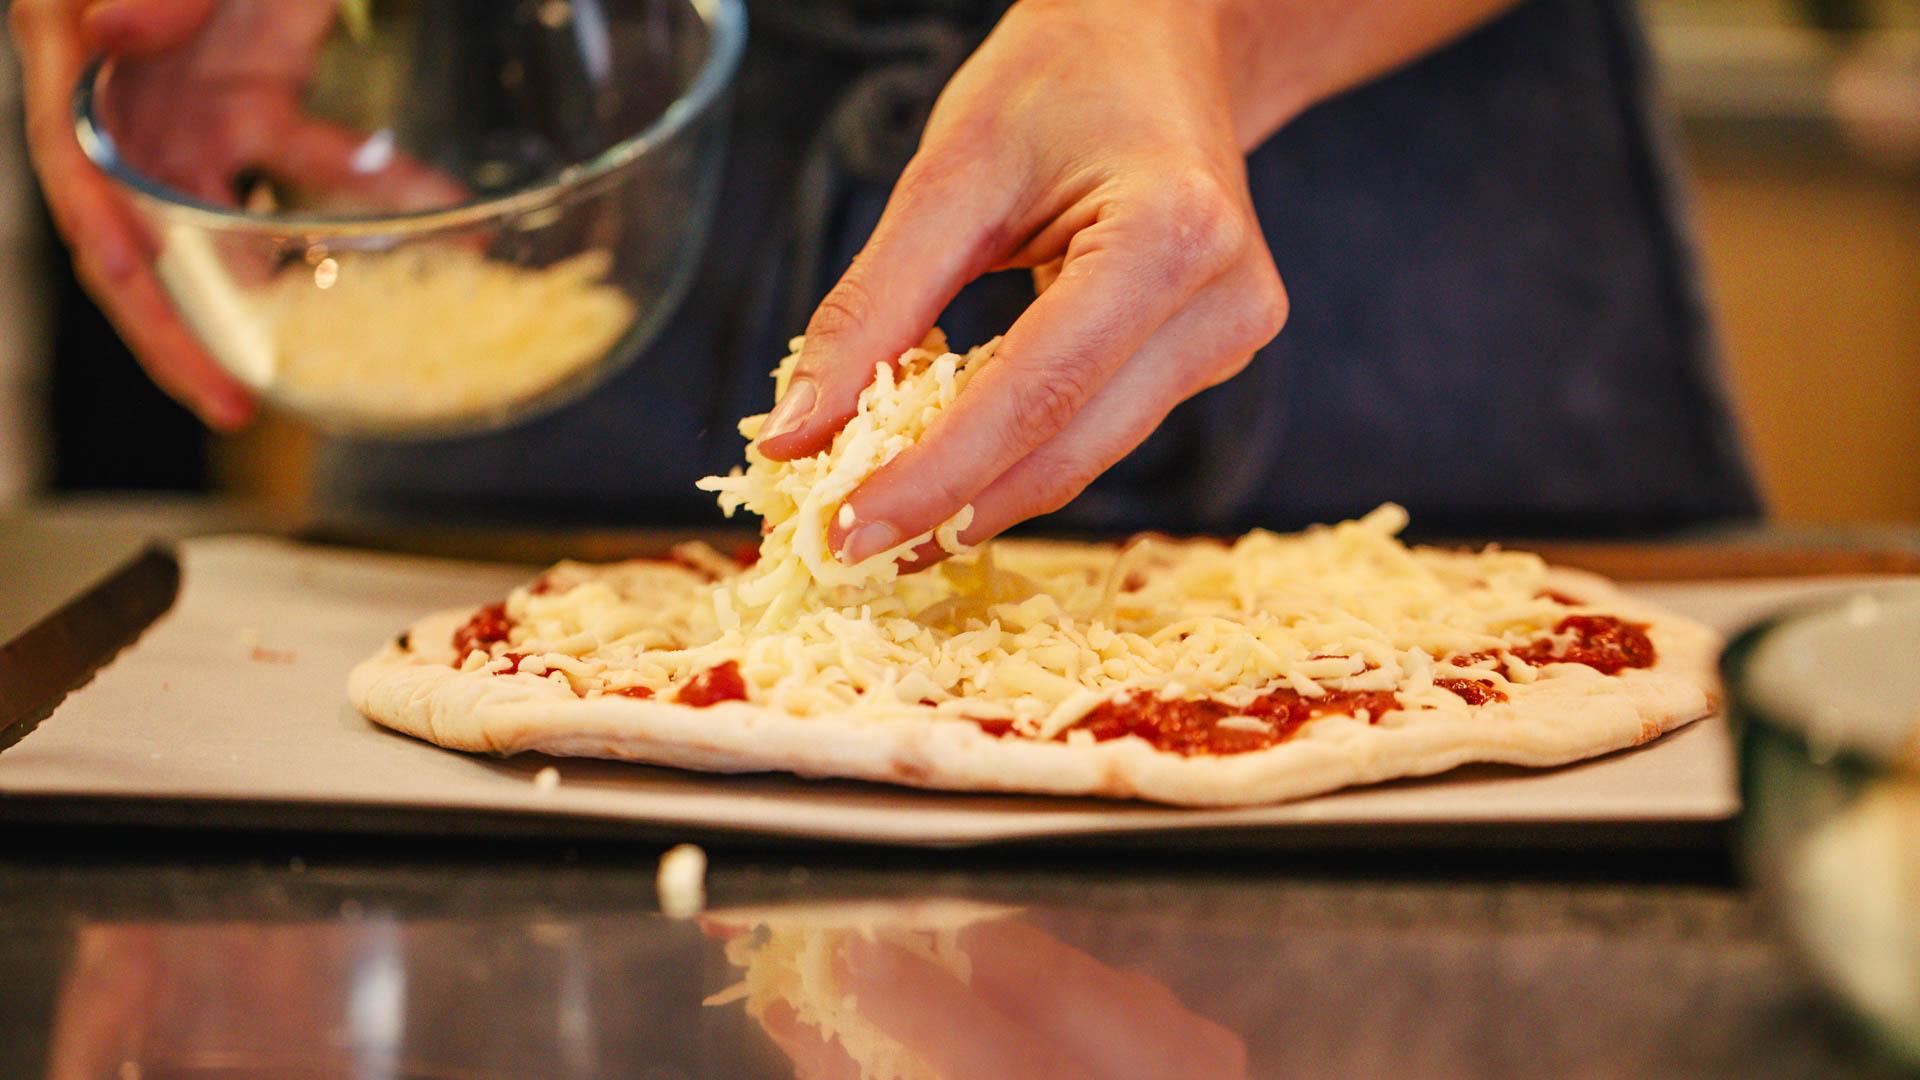
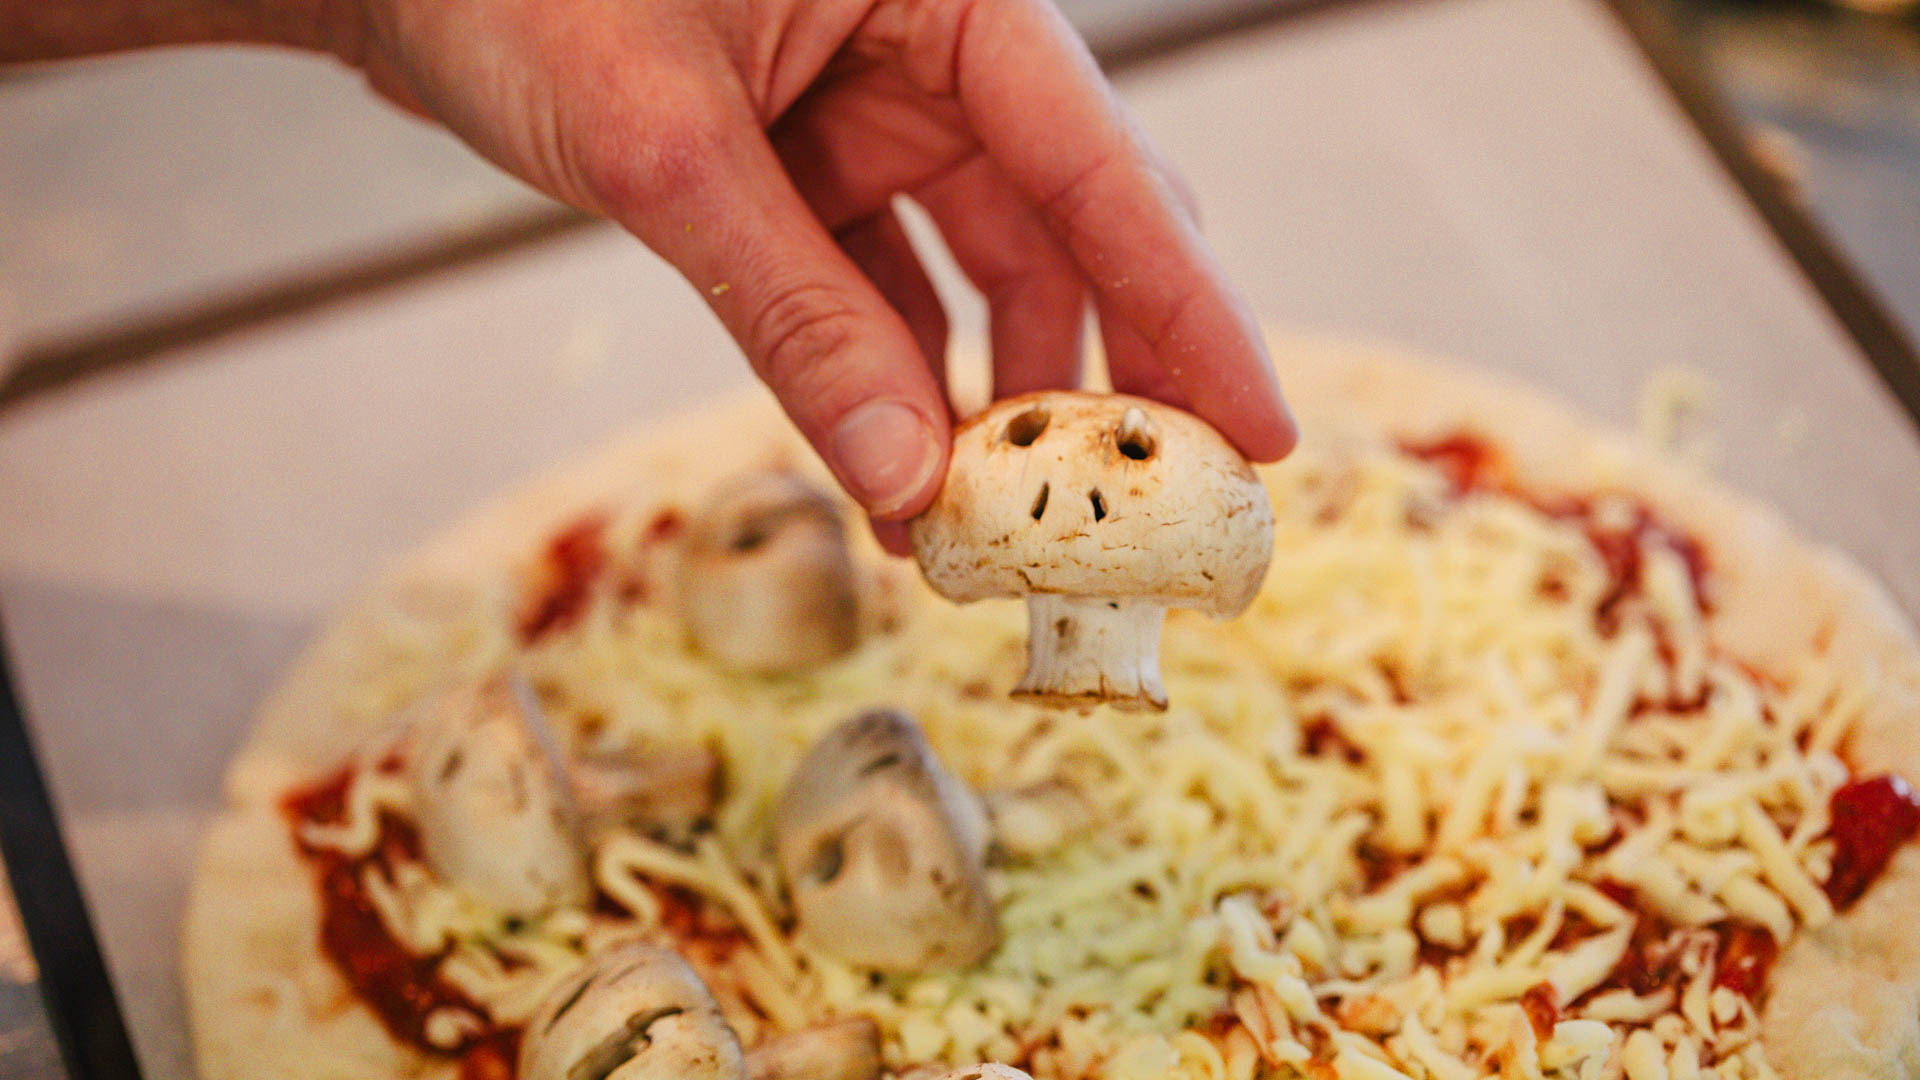
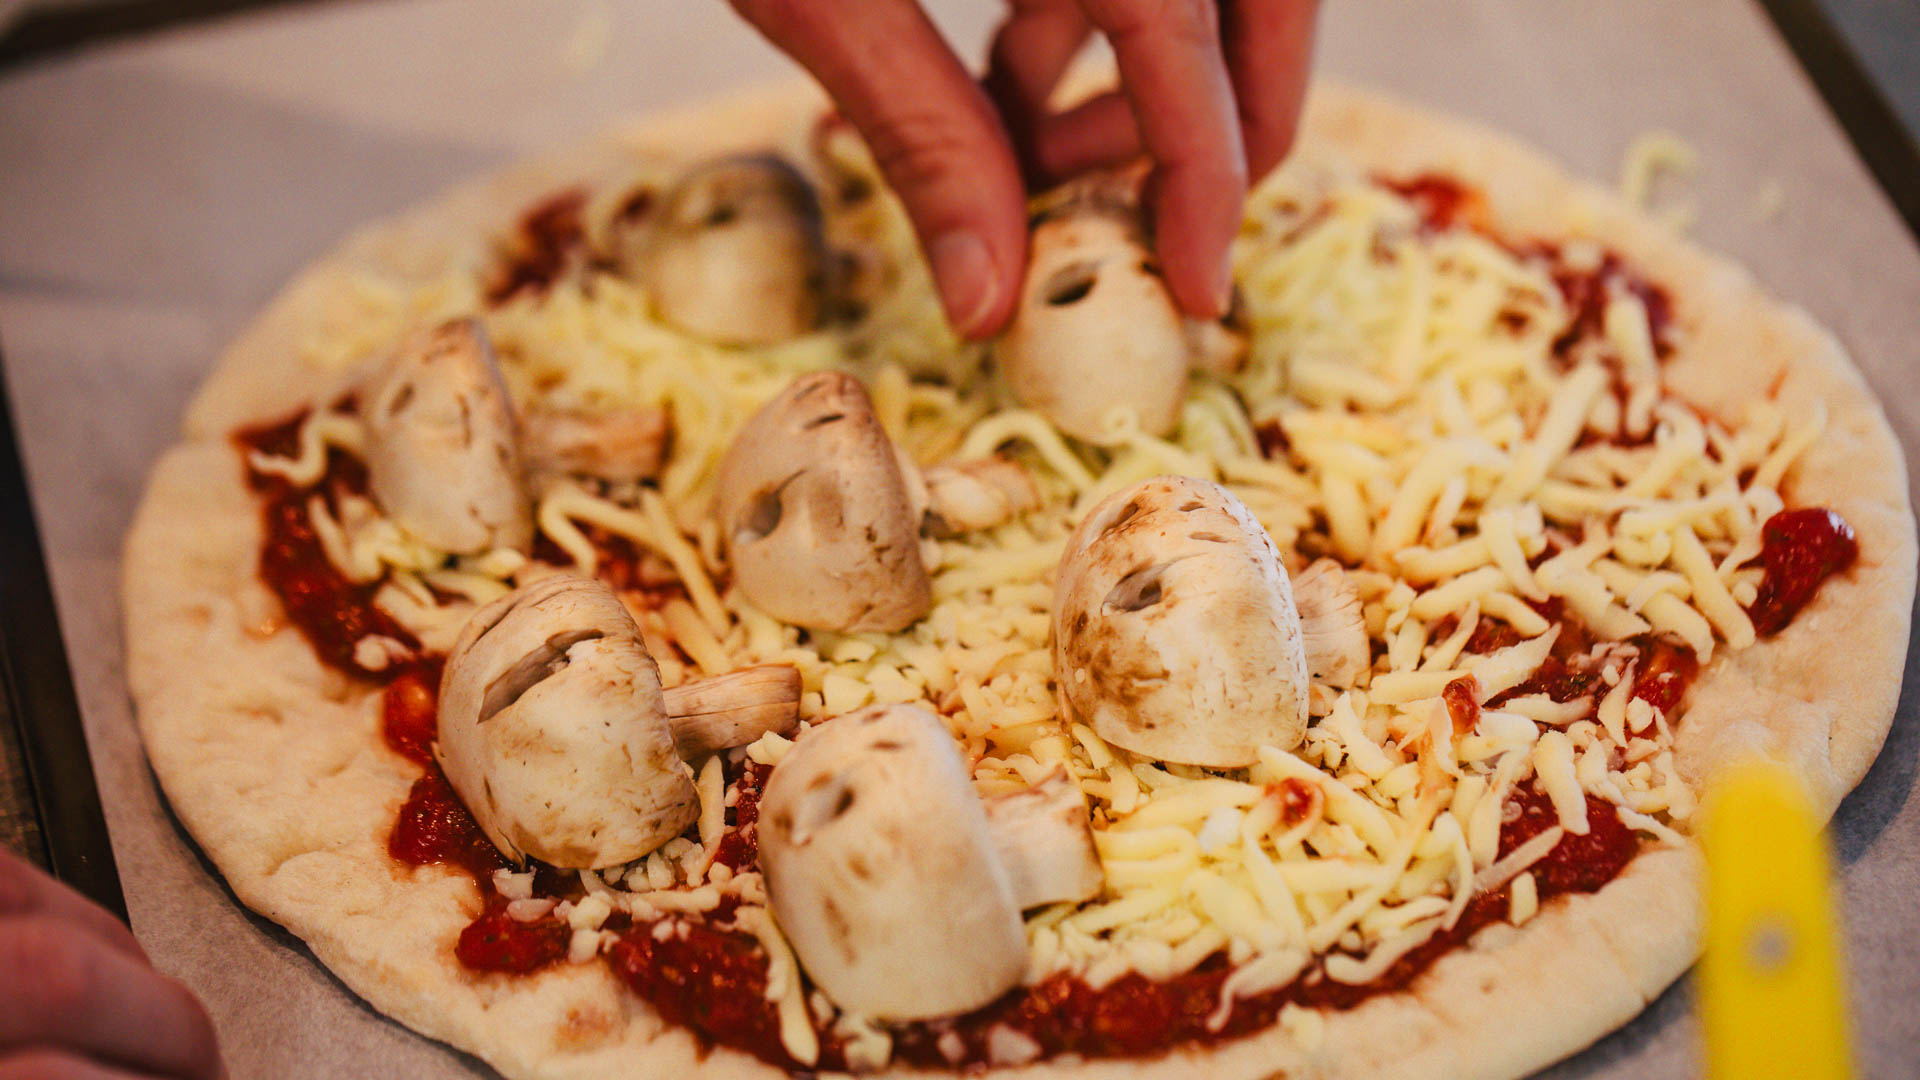
First up is the "Guacamole Barfing Pumpkin"—a spooky Jack-o'-lantern centrepiece that's hilariously gross in the best way. Carve a wide, open mouth on your pumpkin, and let a river of fresh guacamole spill out onto a platter. Pair it with crispy tortilla chips, and dive in for the perfect blend of creepy and tasty! Next, sink your teeth into Mushroom Skull Pizzas. These margarita pizzas are topped with gooey mozzarella and use mushrooms to form eerie little skull faces.
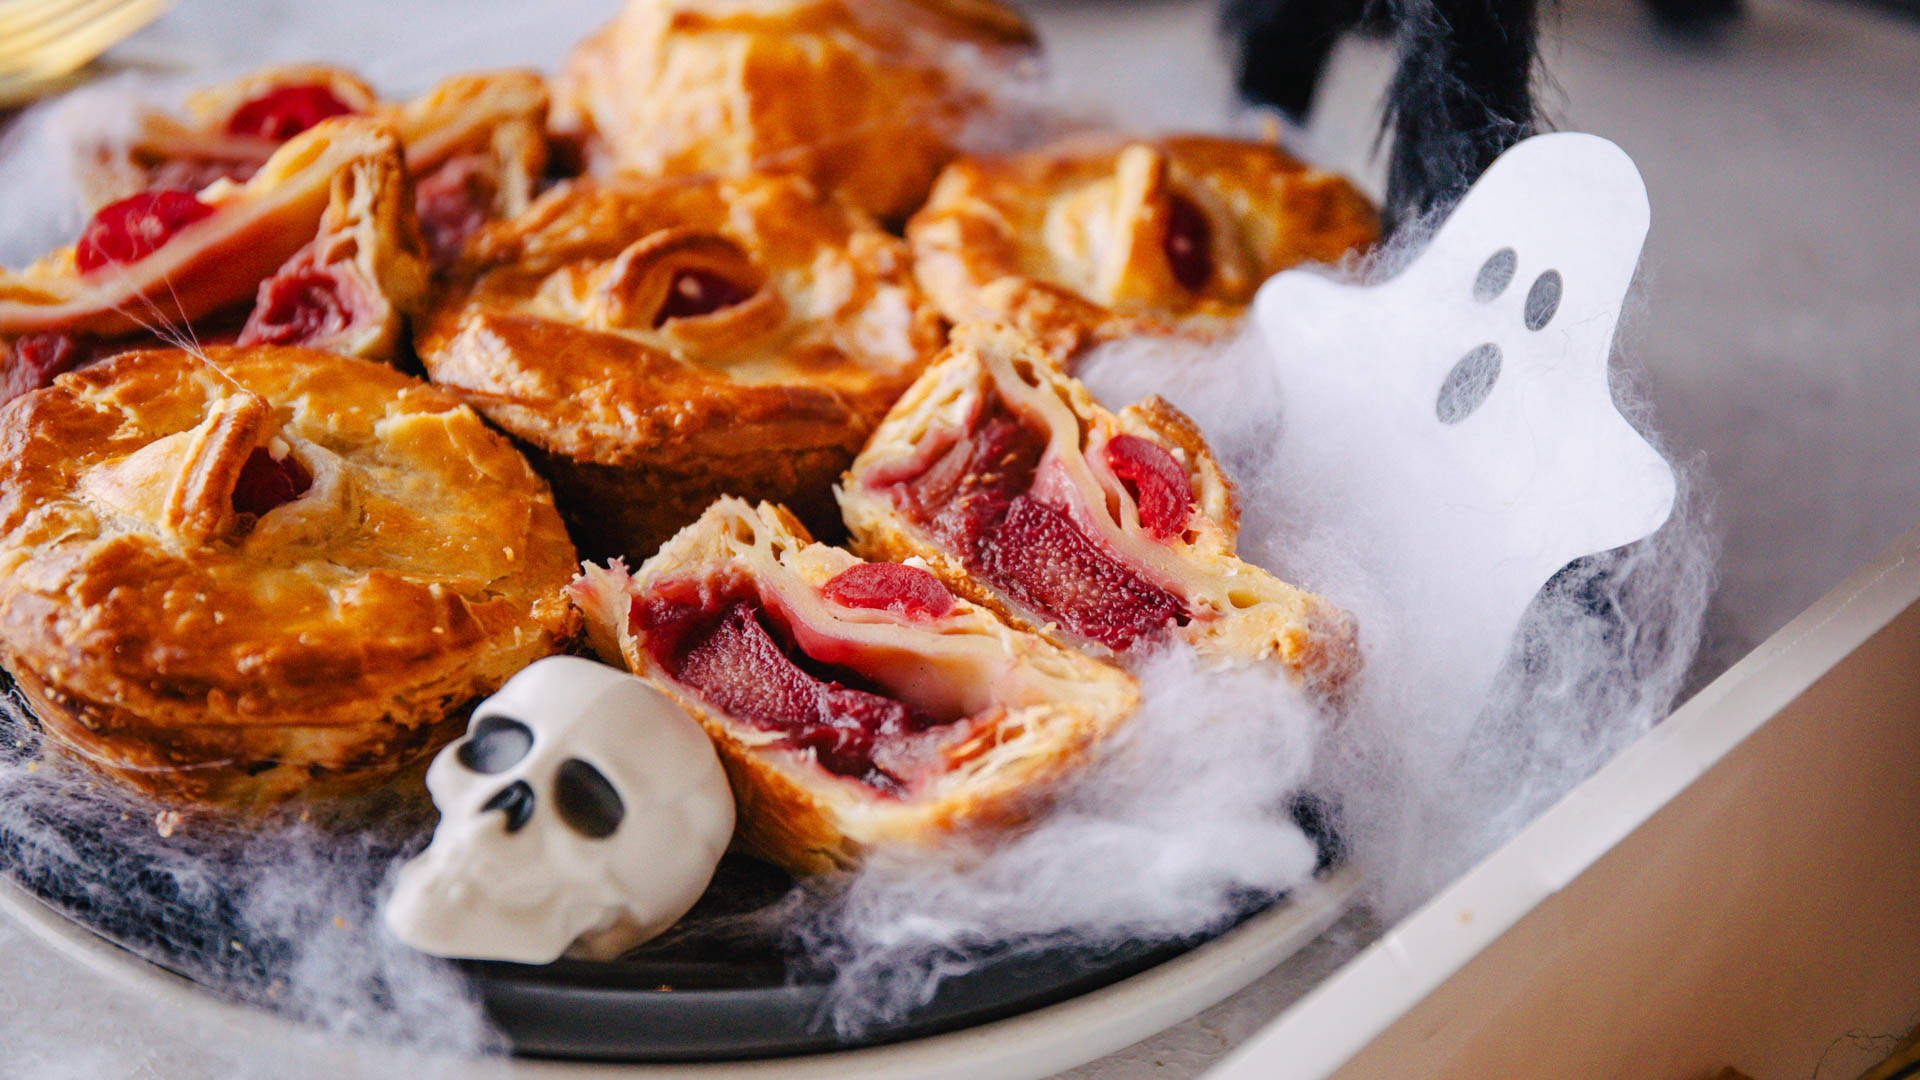
For dessert, you can't miss the Spooky pEYES! With rhubarb filling that oozes like zombie blood, pastry and cherry "eyeballs" staring back at you, it’s just the right mix of freaky and fruity! And to end on a sweet note, indulge in Pumpkin Cheesecake Truffles. These rich, creamy bites are perfect for anyone who loves a bit of pumpkin spice in their Halloween treats—rolled into bite-sized goodness, these cuties are too good to resist.
Get ready for a night full of thrills, chills, and tasty treats you and your friends will discuss until next Halloween!
Guacamole Barfing Pumpkin
- 4 avocados
- 1 shallot
- 2 garlic cloves
- 2 tomatoes
- 1 lime
- 1 packet coriander (optional)
- 1 Halloween pumpkin
- 2 bags corn tortilla chips
- Roughly chop avocados and add to a bowl. Use a fork or potato masher to mash to the desired consistency.
- Finely dice shallot, crush garlic, dice tomatoes, finely chop coriander (including roots and stems) and zest lime. Add to avocado as you go, along with lime juice. Mix to combine and season to taste with salt and pepper. Set aside in the fridge until ready to serve.
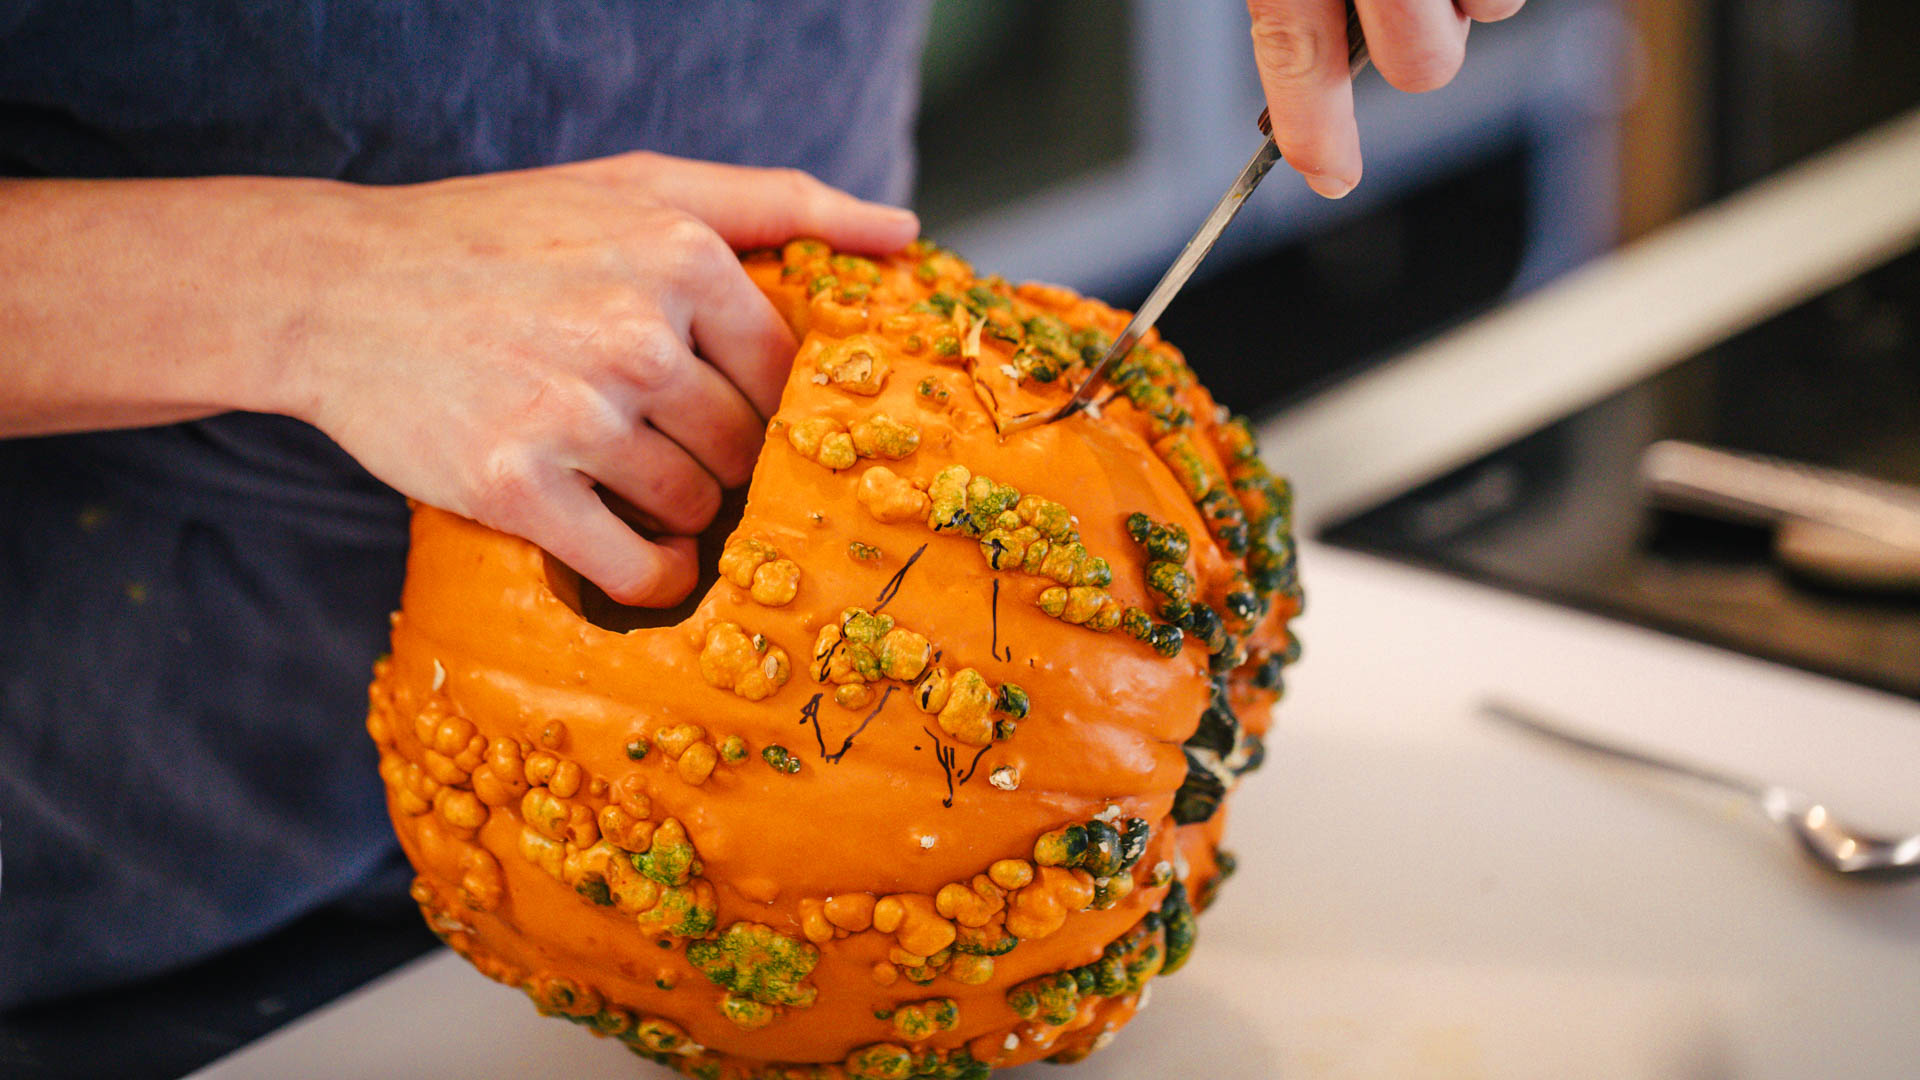
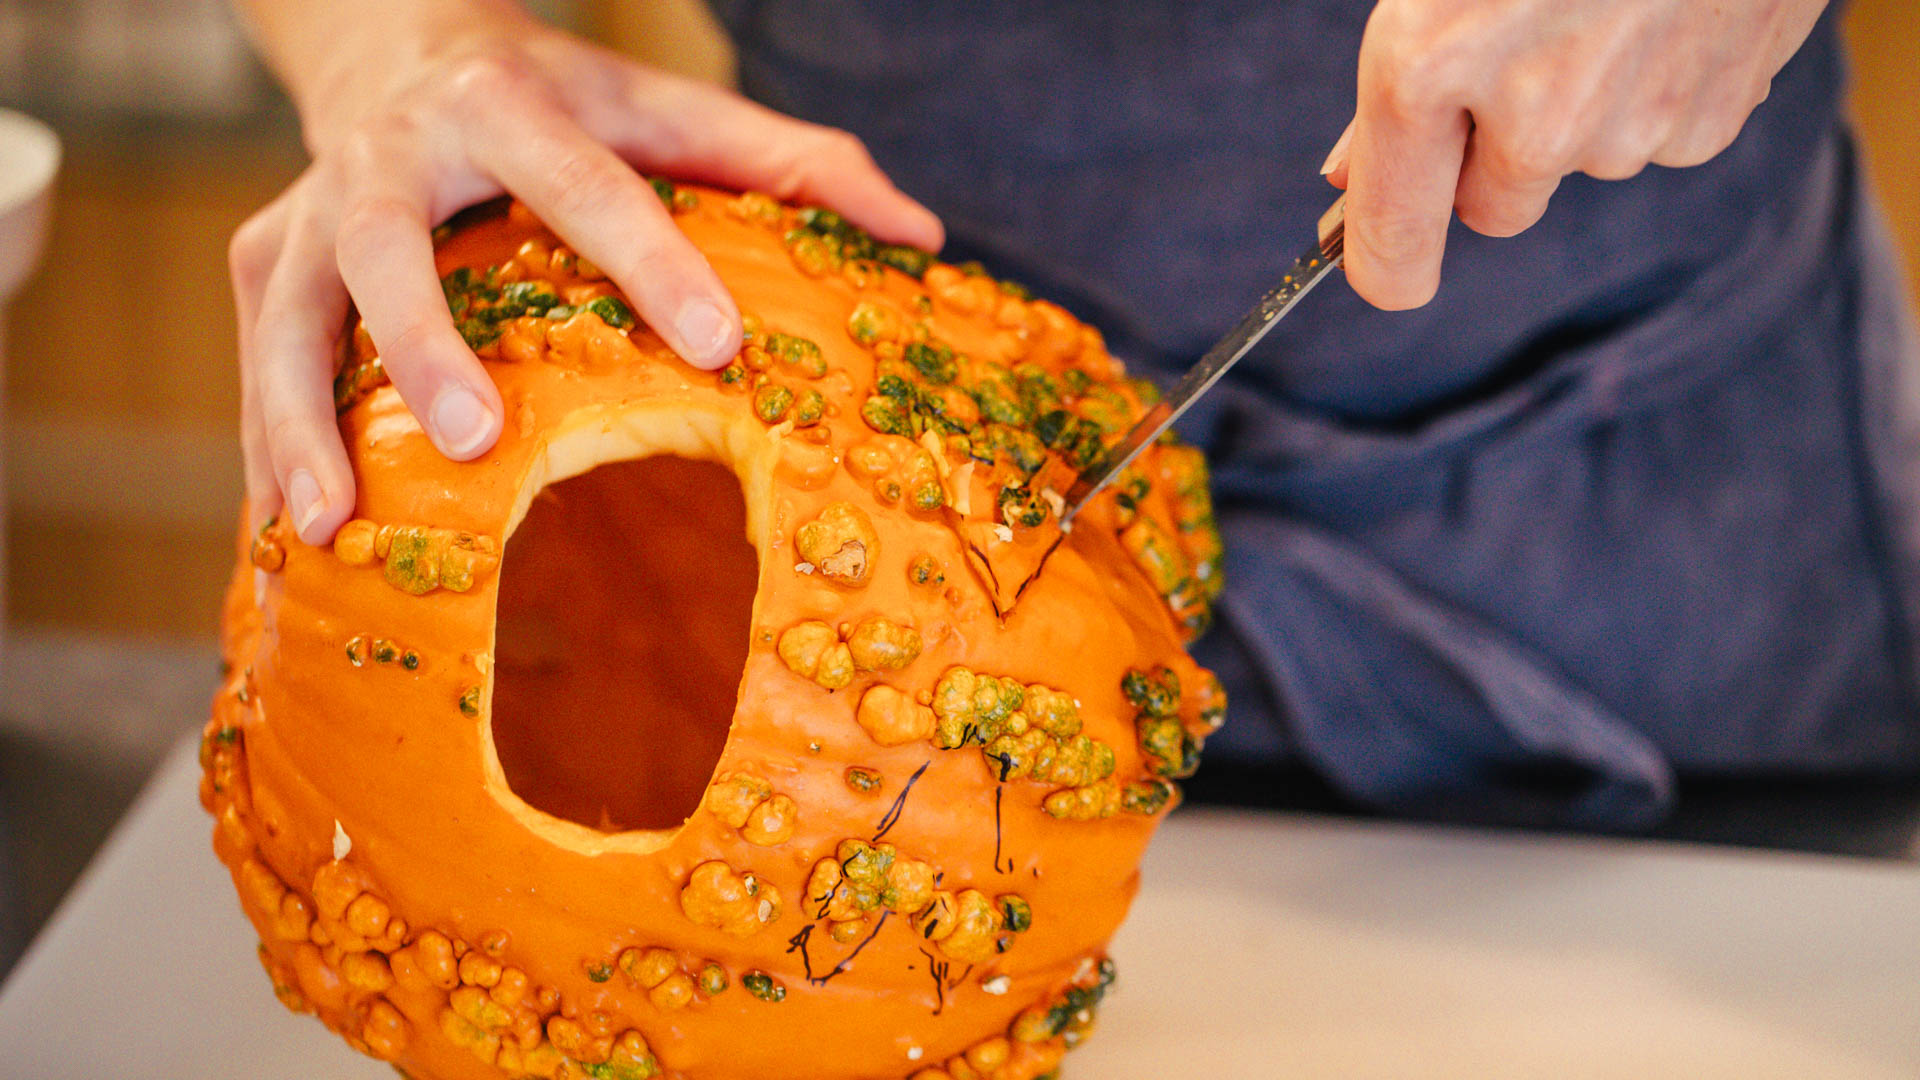
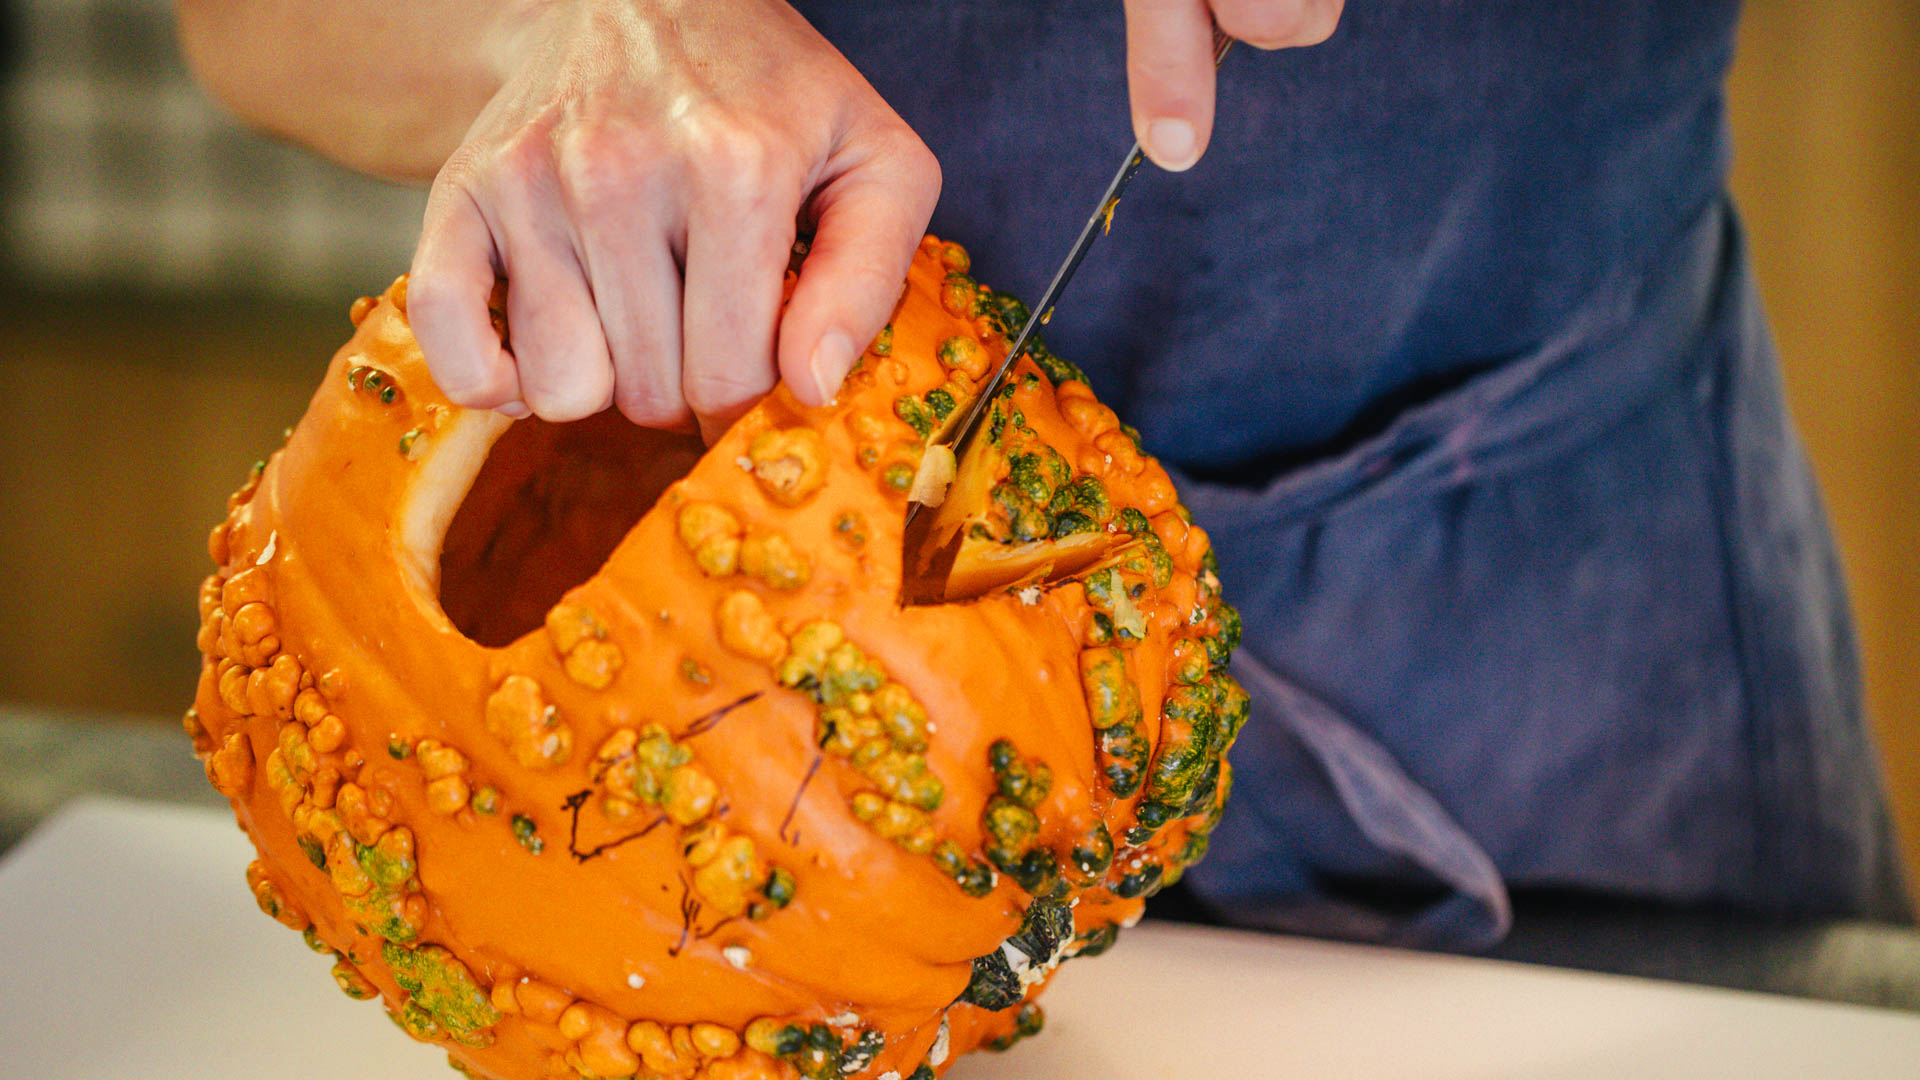
- Use a marker to mark the shapes for your desired facial expression on the pumpkin. Use a sharp knife (somewhere between 10-15cm long) to carve out the shapes.
- If your mouth opening is wide enough, you will be able to scoop the pumpkin insides out. If not, cut open the top of your pumpkin, scoop out the insides and place the top back on.
- Place the pumpkin on a serving tray and spread guacamole from the mouth of the pumpkin, and down the centre of the serving tray. Place tortilla chips on either side.
- Want to spice up the guacamole? Add diced fresh jalapeño, red chilli, dried chilli flakes, or your favourite hot sauce.
- Make it nachos! Use this same concept, but add a large tray of nachos underneath, with the guacamole spilling from the pumpkin's mouth and out over the nachos.
- Pumpkin carving is not for the faint-hearted! You will need a fairly sharp knife to get through the pumpkin and some steady hands to prevent the pumpkin from slipping. If you want to include your kids in the carving, supervise them at all times.
Want to make this at home? We used the Fiesta Guacamole Kit, Proper Crisps Cheeza-peno White Corn Tortilla Chips and a Halloween Pumpkin from the Dinner Twist Marketplace.


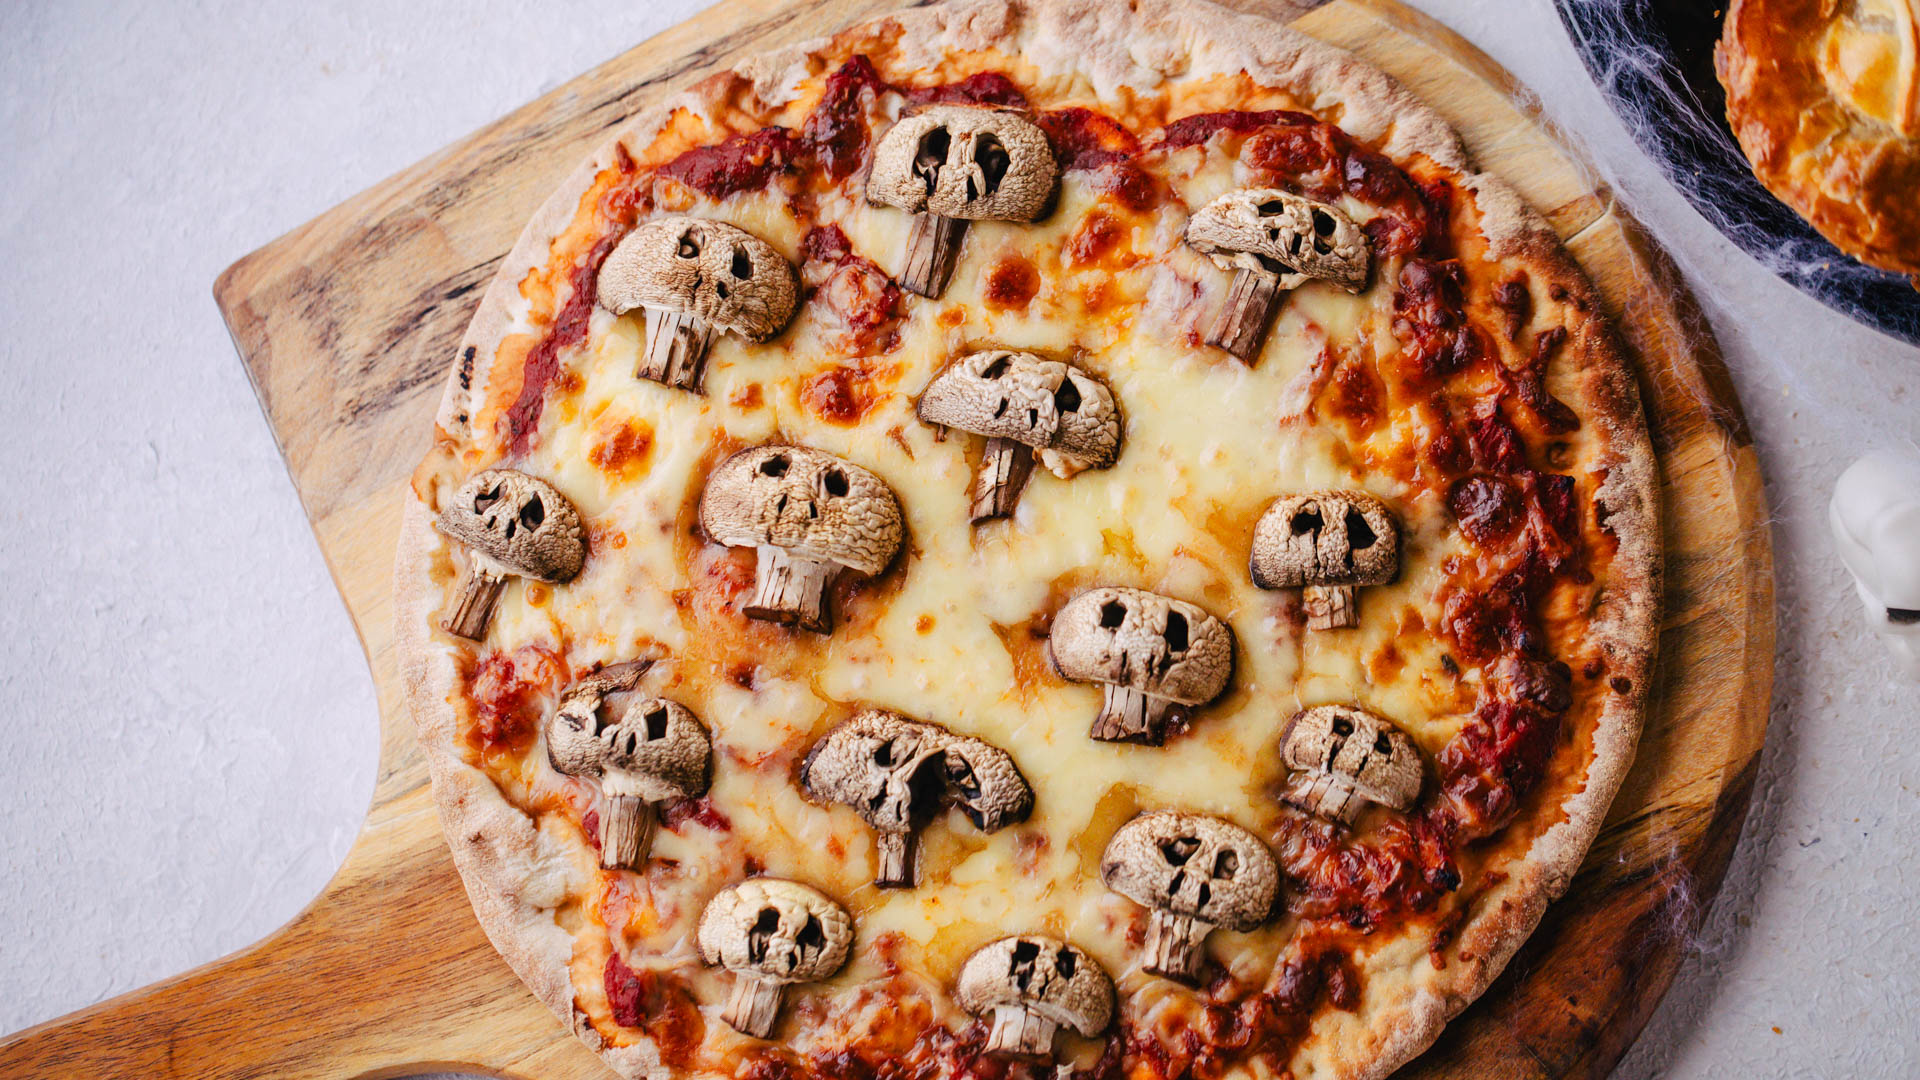 Mushroom Skull Pizzas
serves 2-4
- 300g button mushrooms (with stems intact)
- 2x 50g sachet pizza sauce
- 1 tbsp dried oregano
- 4 small pizza bases
- 180g shredded mozzarella cheese
- Halve mushrooms. Use a straw to form the large eye holes on the round side of the mushroom cap. Use a small knife to cut the nose holes and to scrape down the stem to create teeth. Set aside in the fridge until ready to use.
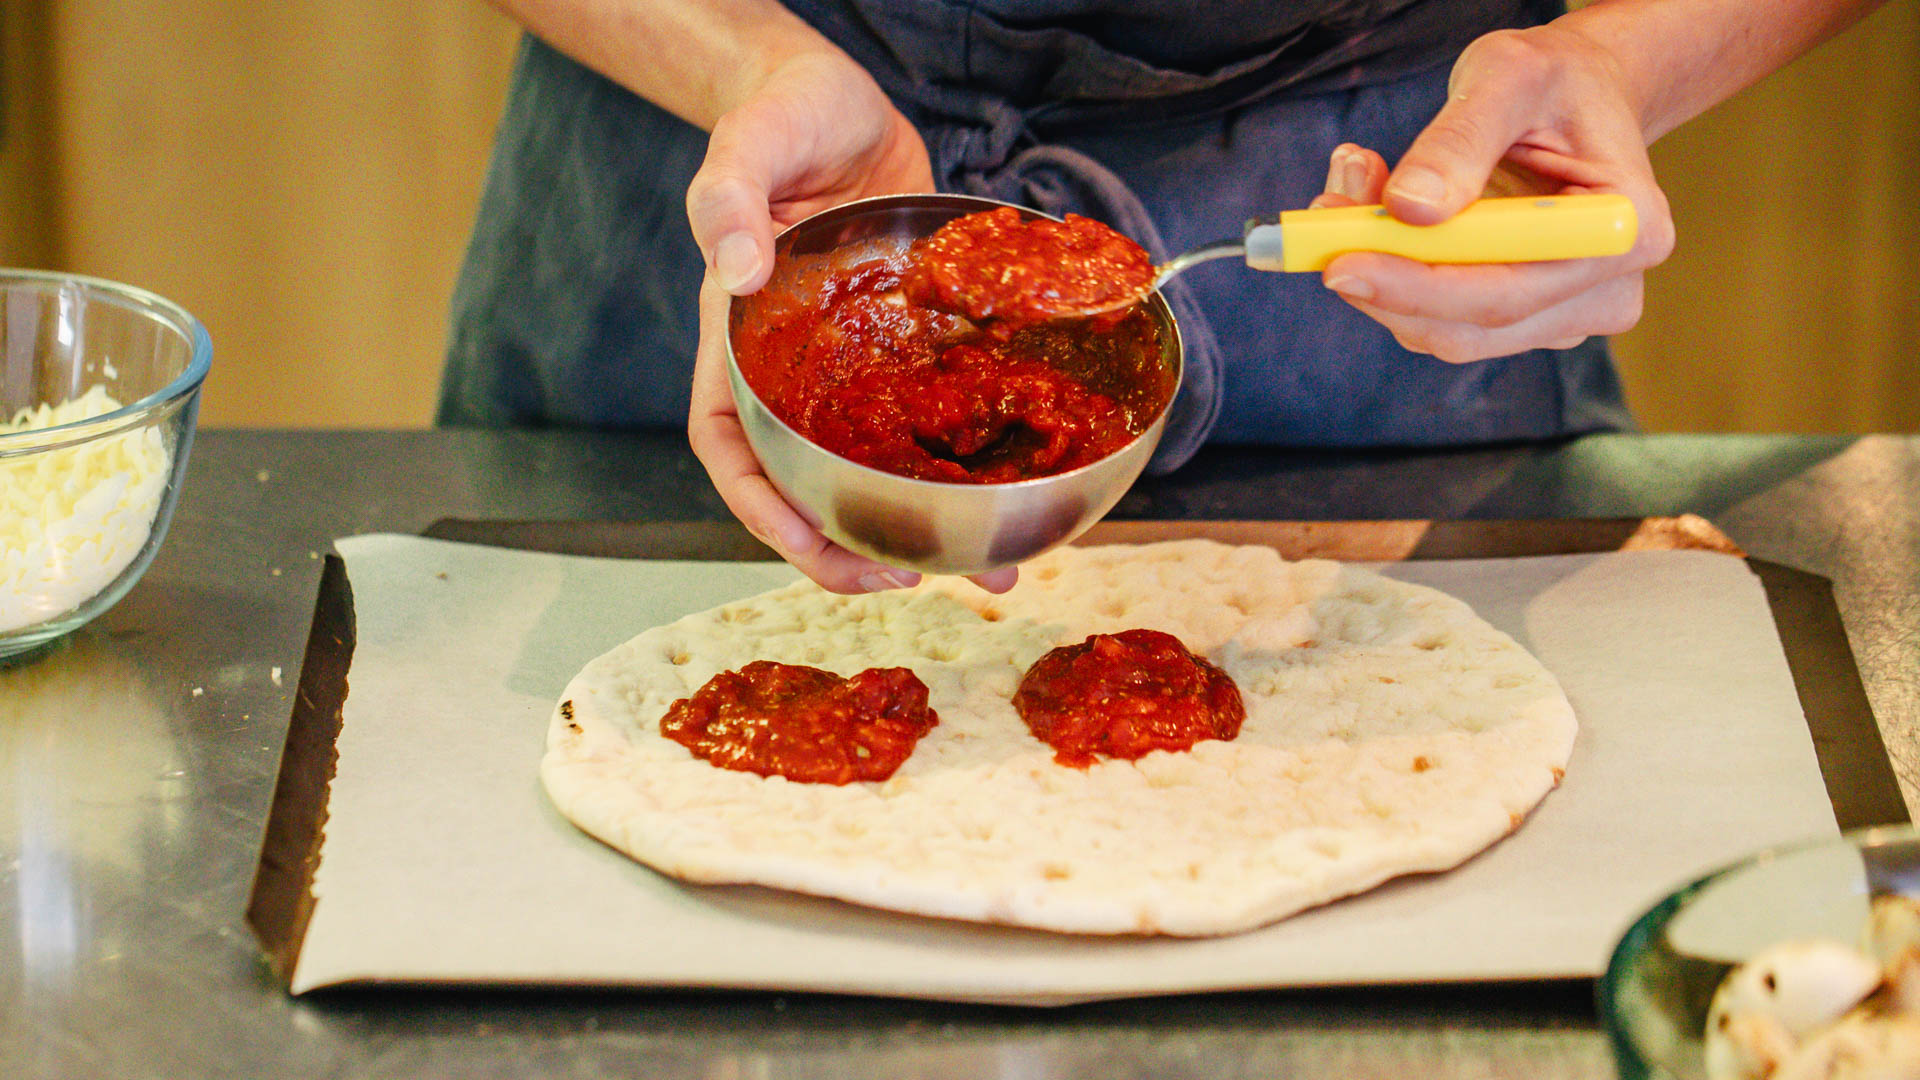
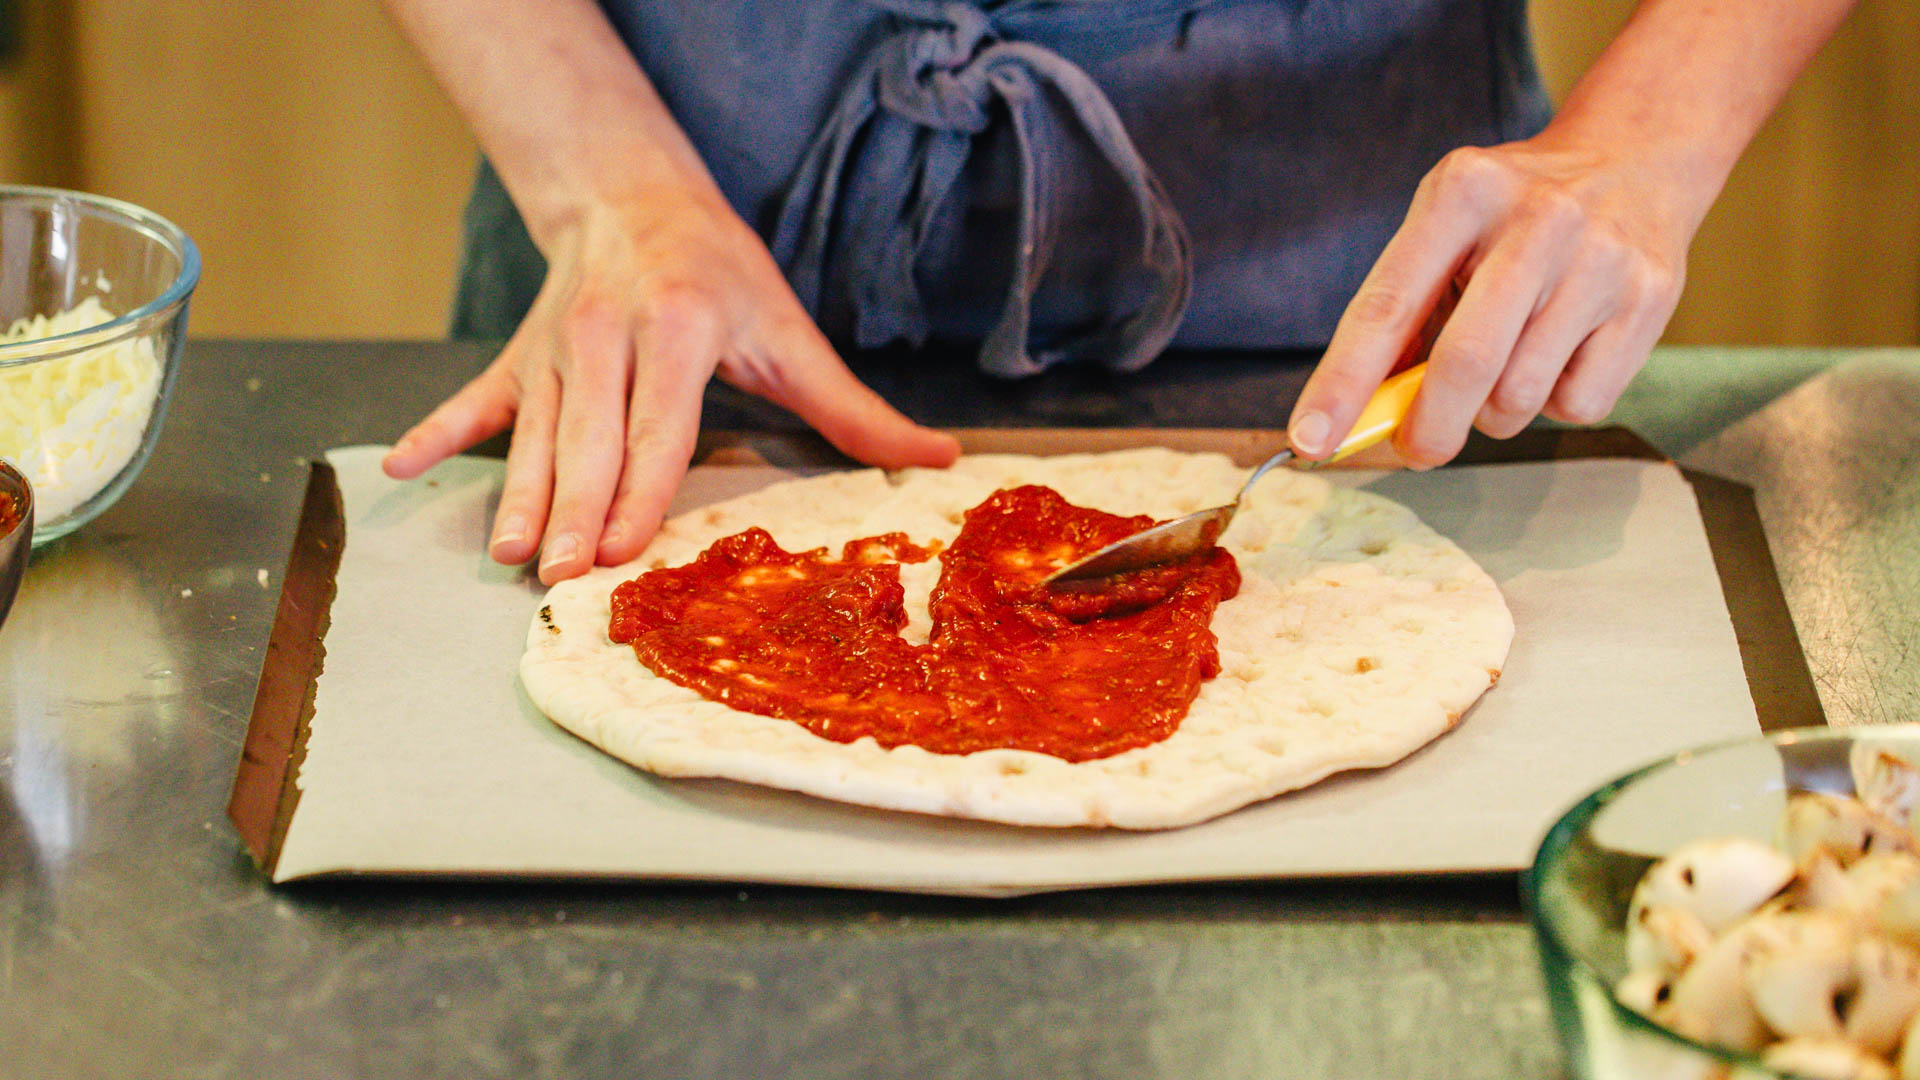
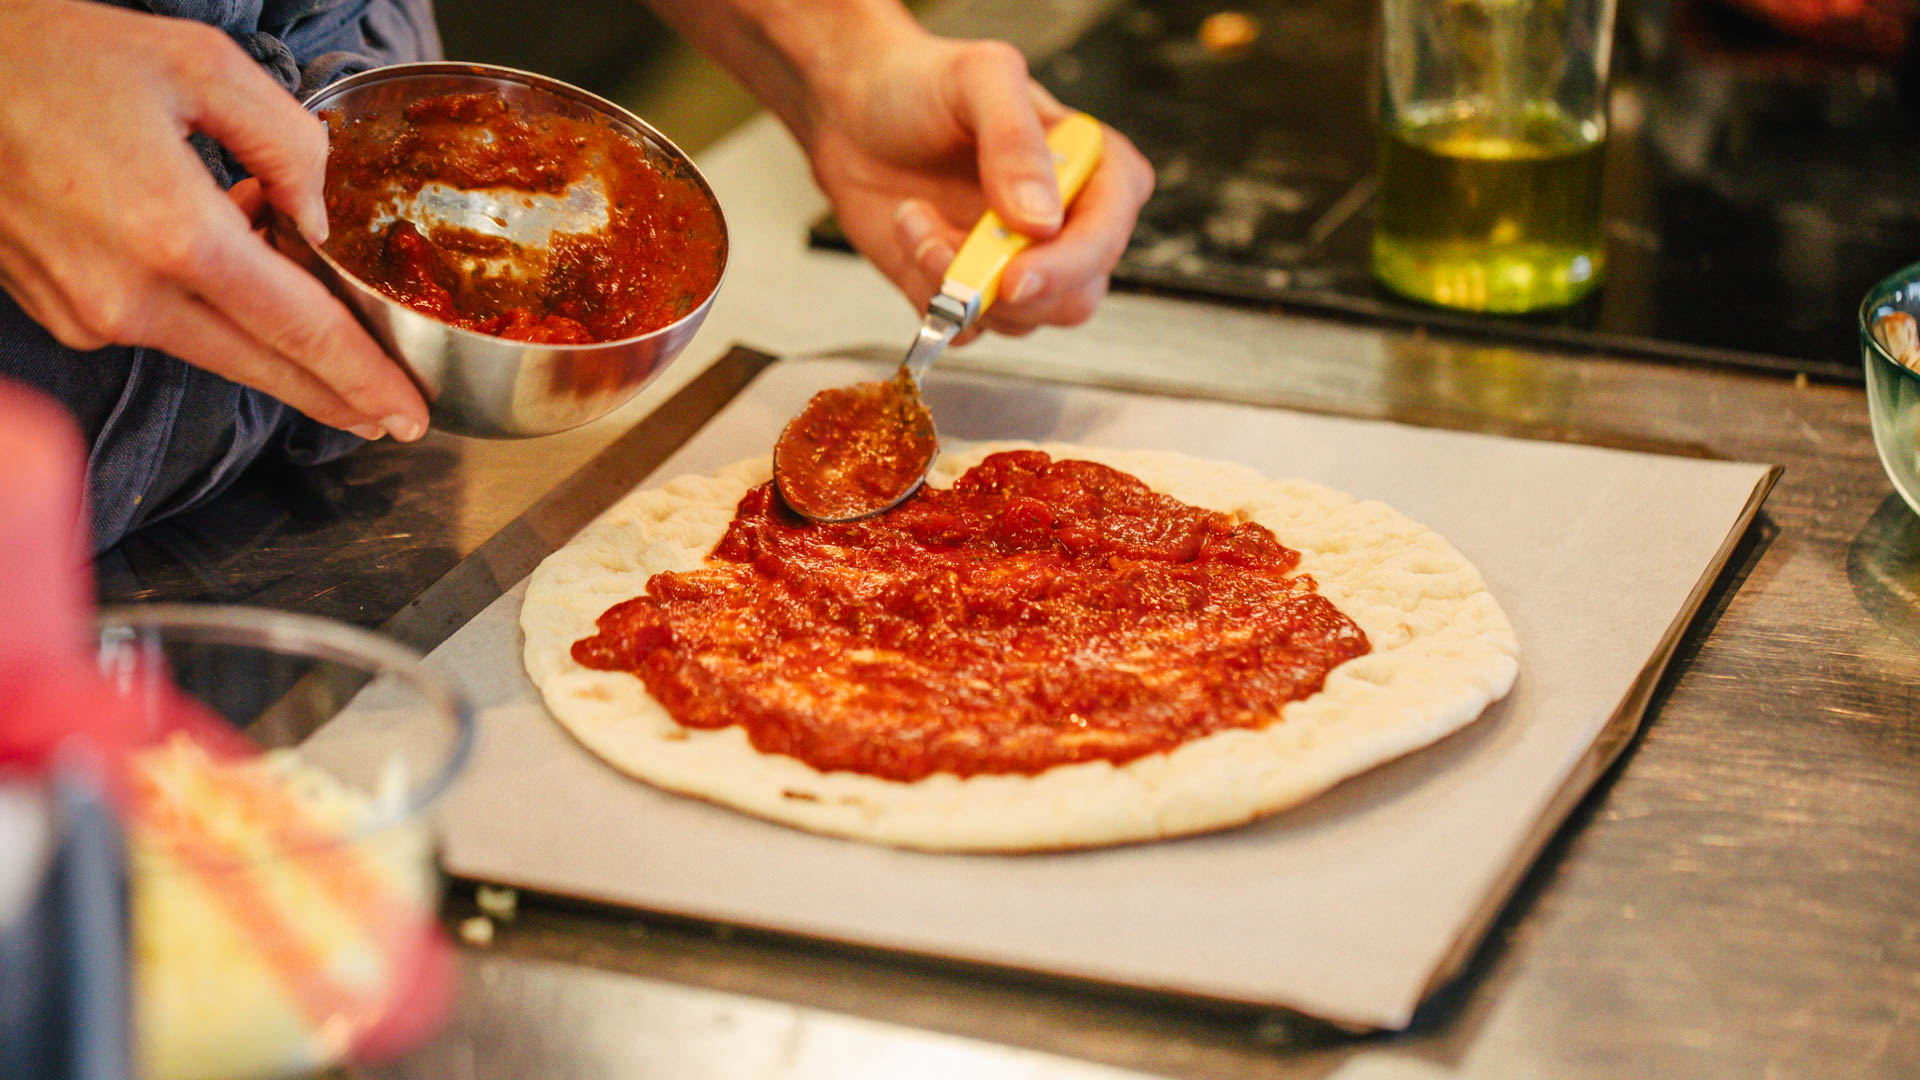
- Set oven to 220ºC. Add pizza sauce to a bowl along with oregano and mix to combine.
- Place pizza bases on lined oven trays. Spread pizza sauce over the bases. Top with cheese and place skull mushrooms on top.
- Cook pizza for 5-10 minutes until golden and cheese is melted.
- Top this pizza with all your favourites; ham, salami, capsicum or olives.
Want to make this at home? We used the Make Your Own Pizza Bundle, Global Spices Dried Oregano, or make it gluten-free with The Gluten Free Lab Pizza Bases from the Dinner Twist Marketplace.


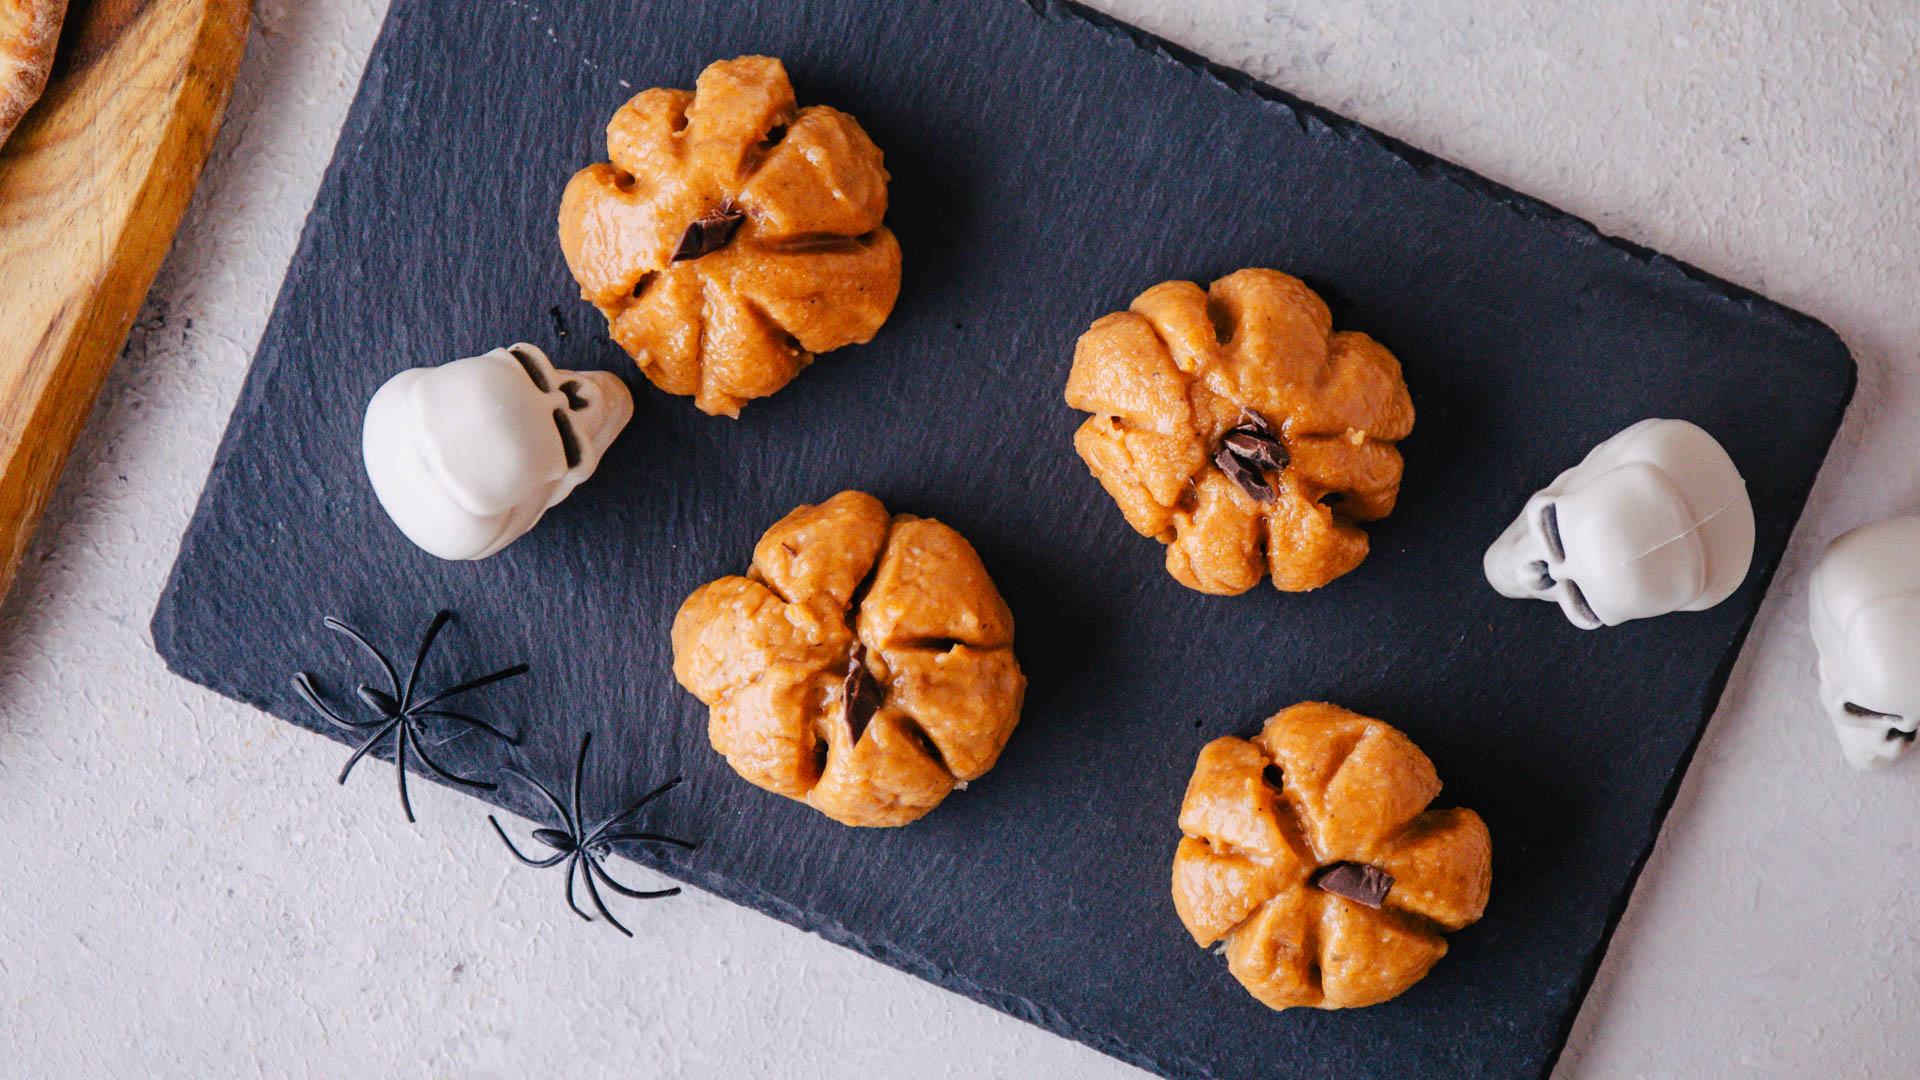
Pumpkin Truffle Bites
serves 2-4
- 1 tablespoon butter
- 150g cream cheese, softened at room temperature
- ½ cup canned pumpkin puree
- 400ml condensed milk
- 3 tsp ground cinnamon
- 3/4 tsp ground ginger
- 1/2 tsp ground nutmeg
- 1/4 tsp ground cloves
- 1/4 tsp allspice
- Pinch ground black pepper
- ½ cup ground sweet biscuits
- ⅓ cup white chocolate chips
- Granulated sugar, as needed, for rolling
- Chocolate for pumpkin stems
- Add butter, cream cheese, pumpkin, condensed milk, and pumpkin pie spice in a saucepan over medium heat. Stir often for 6-8 minutes until thickened and well combined.
- Add crushed biscuits and white chocolate chips. Stir continuously until the chocolate is melted. Optional: Add a few drops of food colouring if desired.
- Continue to stir for 2-4 minutes until the mixture releases from the sides and bottoms of the pan when stirred (if in doubt, cook a bit longer; it's better for the mixture to be thicker than too thin.)
- Transfer the mixture to a lined oven dish. Spread into an even layer and refrigerate overnight.
- Use oiled hands to roll 2 teaspoonfuls of chilled dough into balls.
- Pour sugar into a shallow bowl and roll the truffles in granulated sugar to coat.
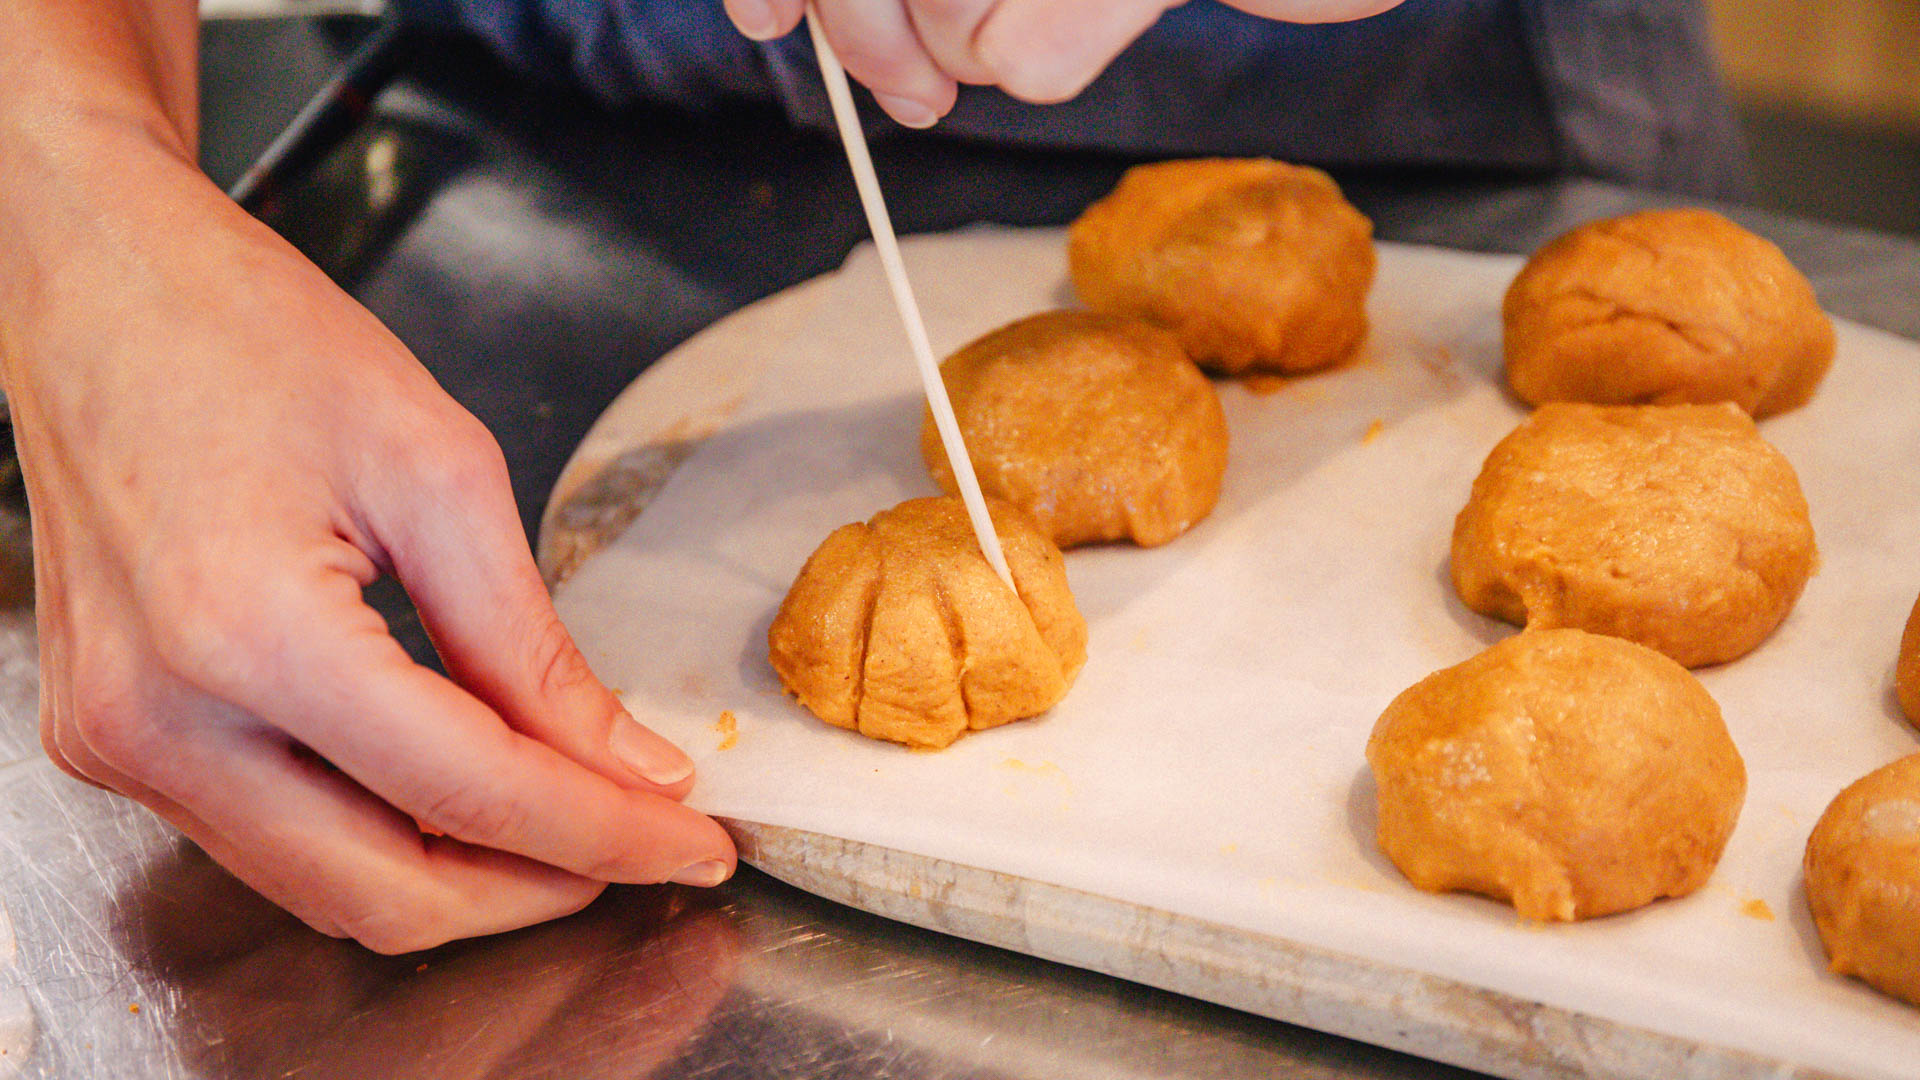
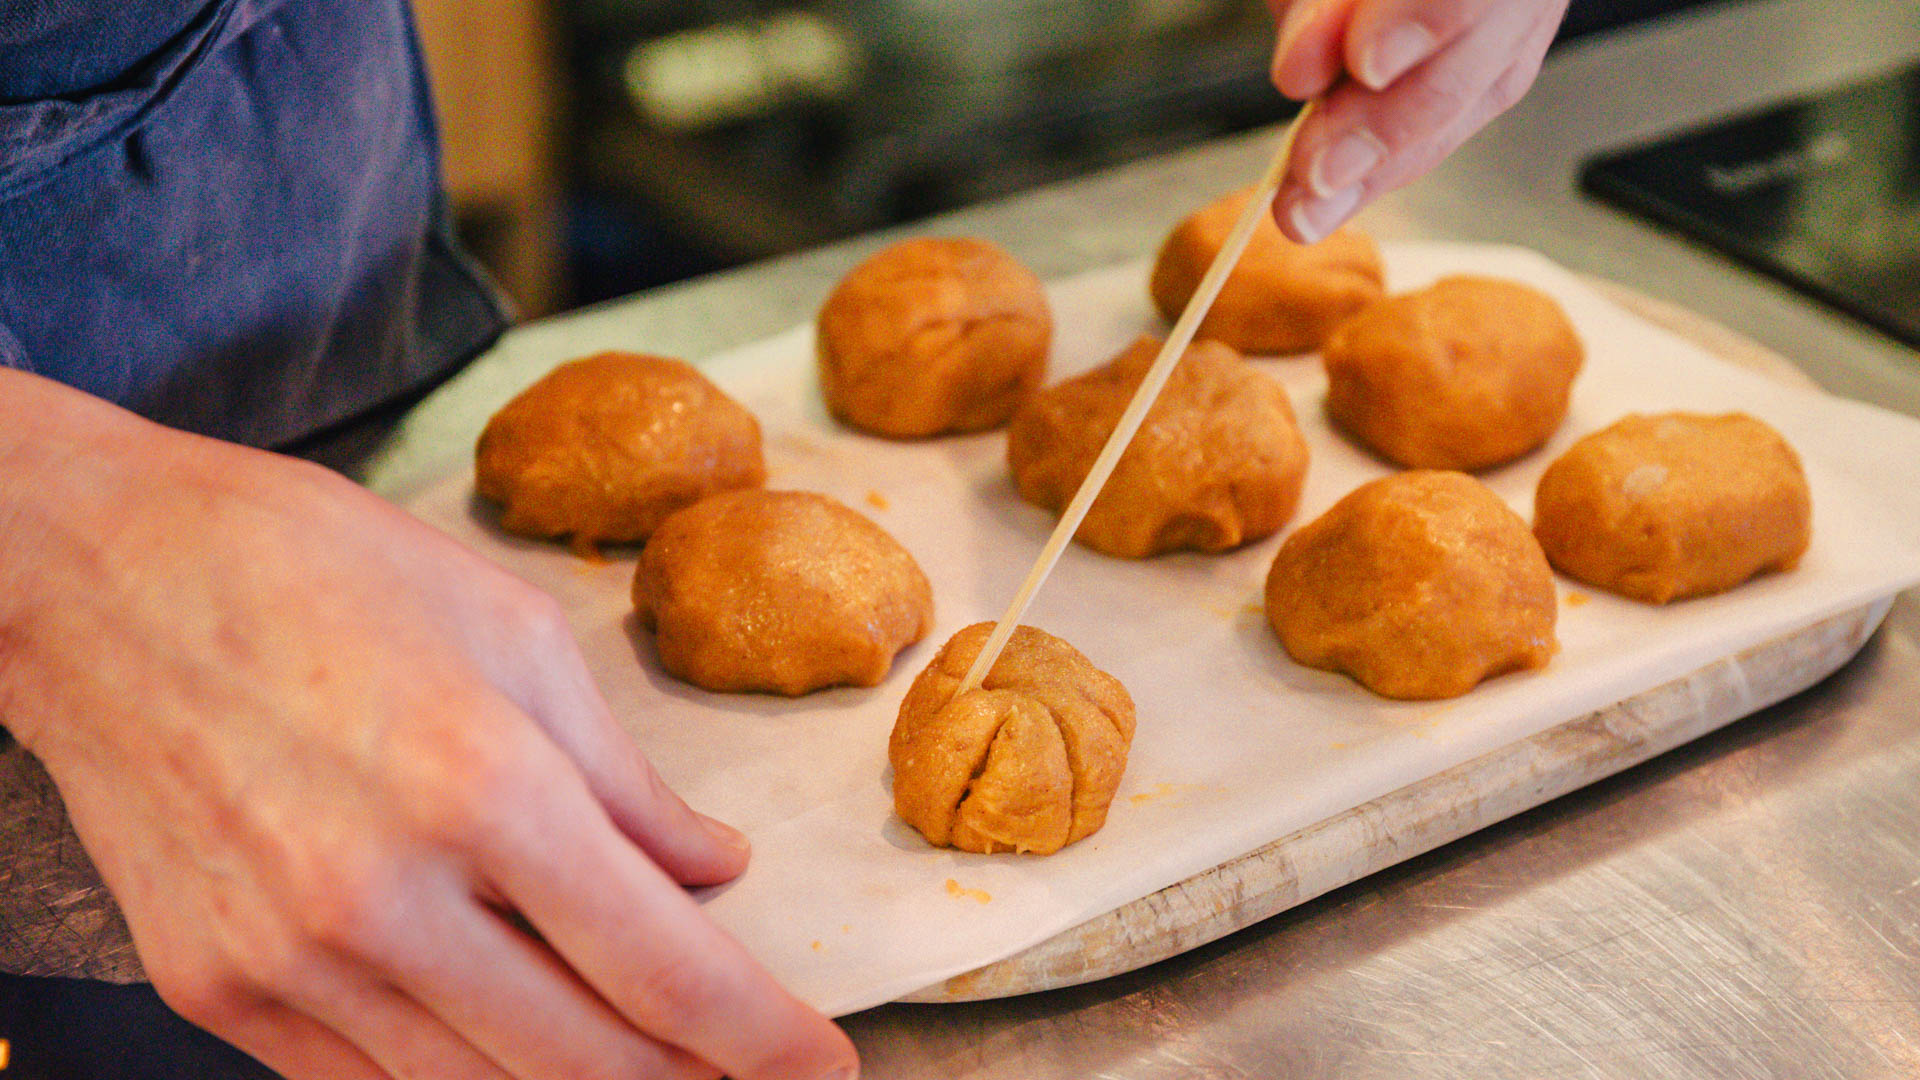
- Use a toothpick to make ridges along the sides of the pumpkin truffles. Top with dark chocolate pieces to look like stems. Serve immediately or refrigerate until ready to serve.
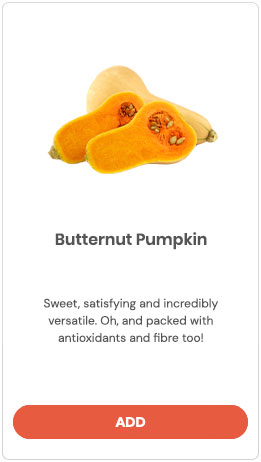
- We used 1/2 a medium-sized butternut pumpkin. Peel and roughly chop, then boil until extremely soft. Drain and allow to cool. Blend to puree consistency.
- Make truffles smaller or larger, depending on your preference.
Want to make this at home? We used Philadelphia Cream Cheese, Butternut Pumpkin, and Global Spices Ground Ginger from the Dinner Twist Marketplace.

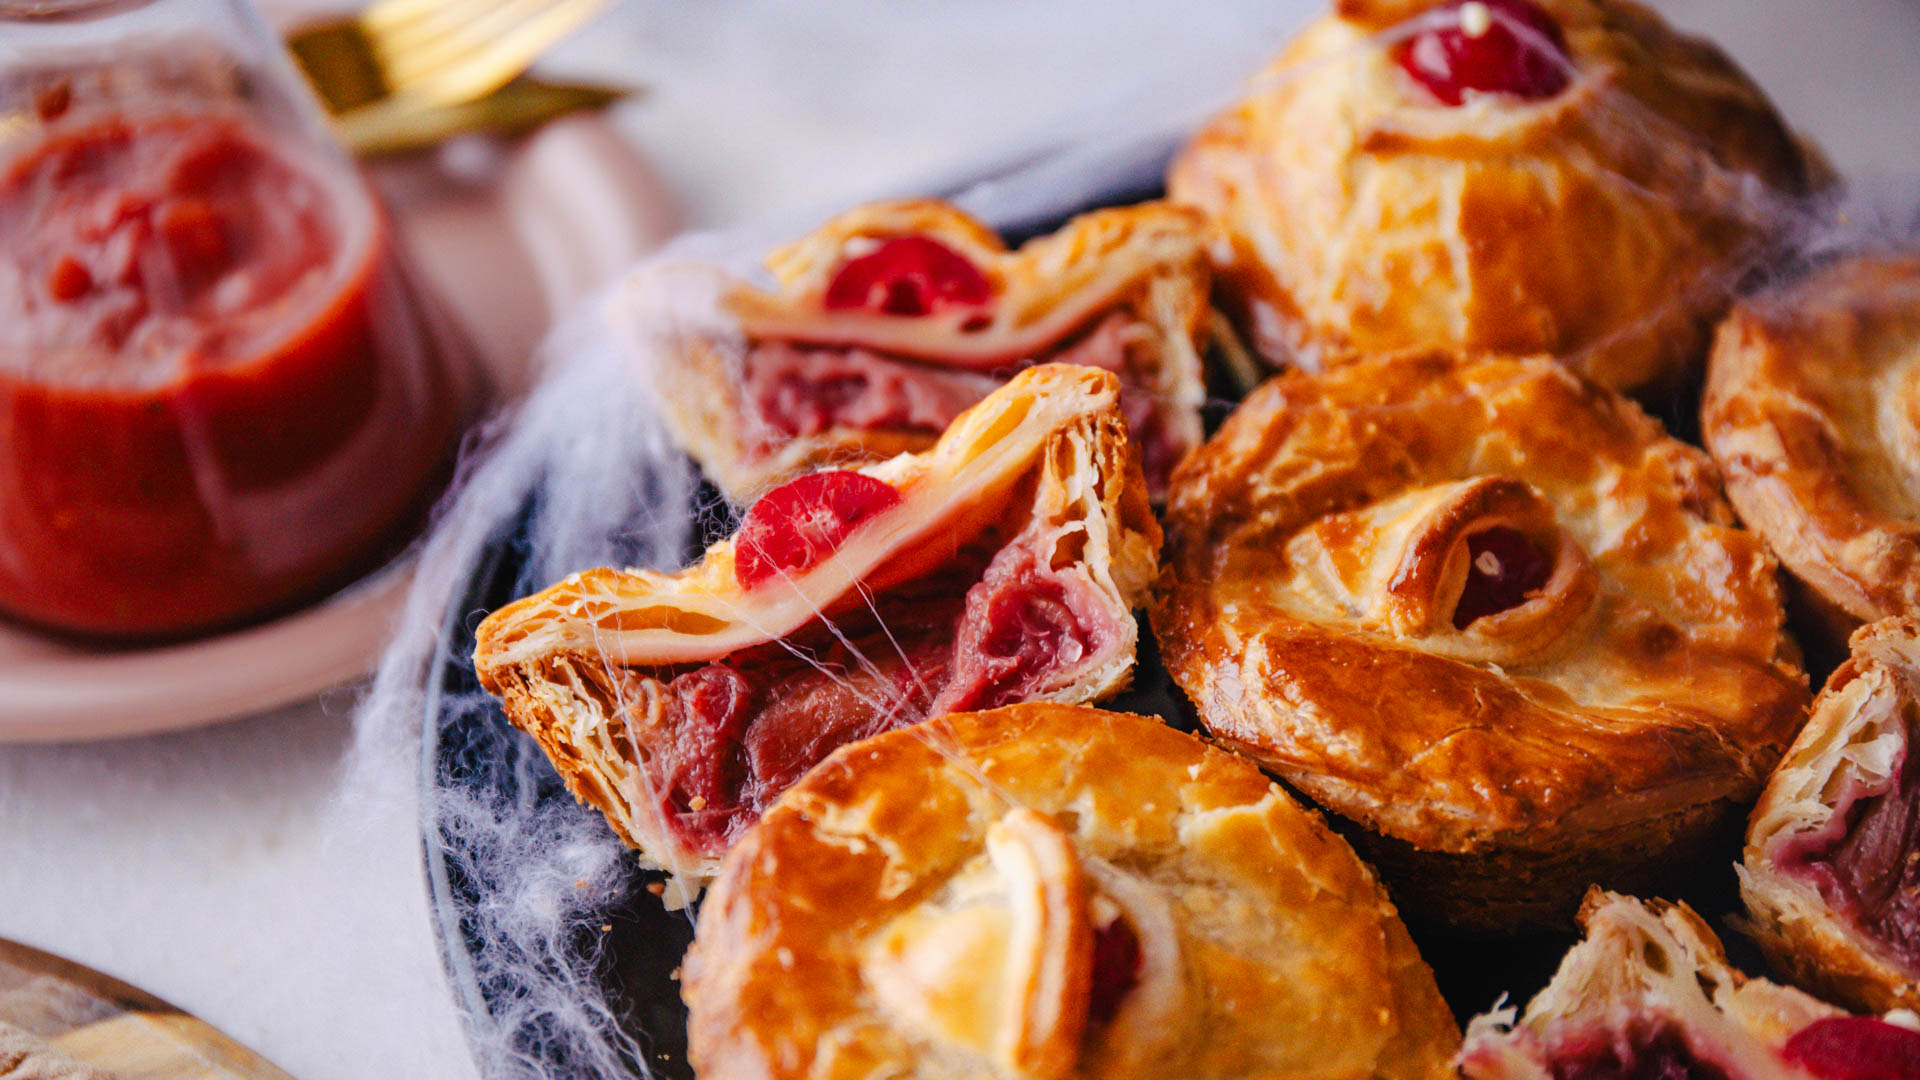
Bloody Eye Pies
serves 2-4
- 600g (approx) shortcrust pastry, thawed
- 1 bunch (450g approx) rhubarb
- 1/3 cup sugar
- 1 tsp vanilla paste
- 2 eggs
- frozen, pitted cherries (do not thaw)
- white food colour for eye details
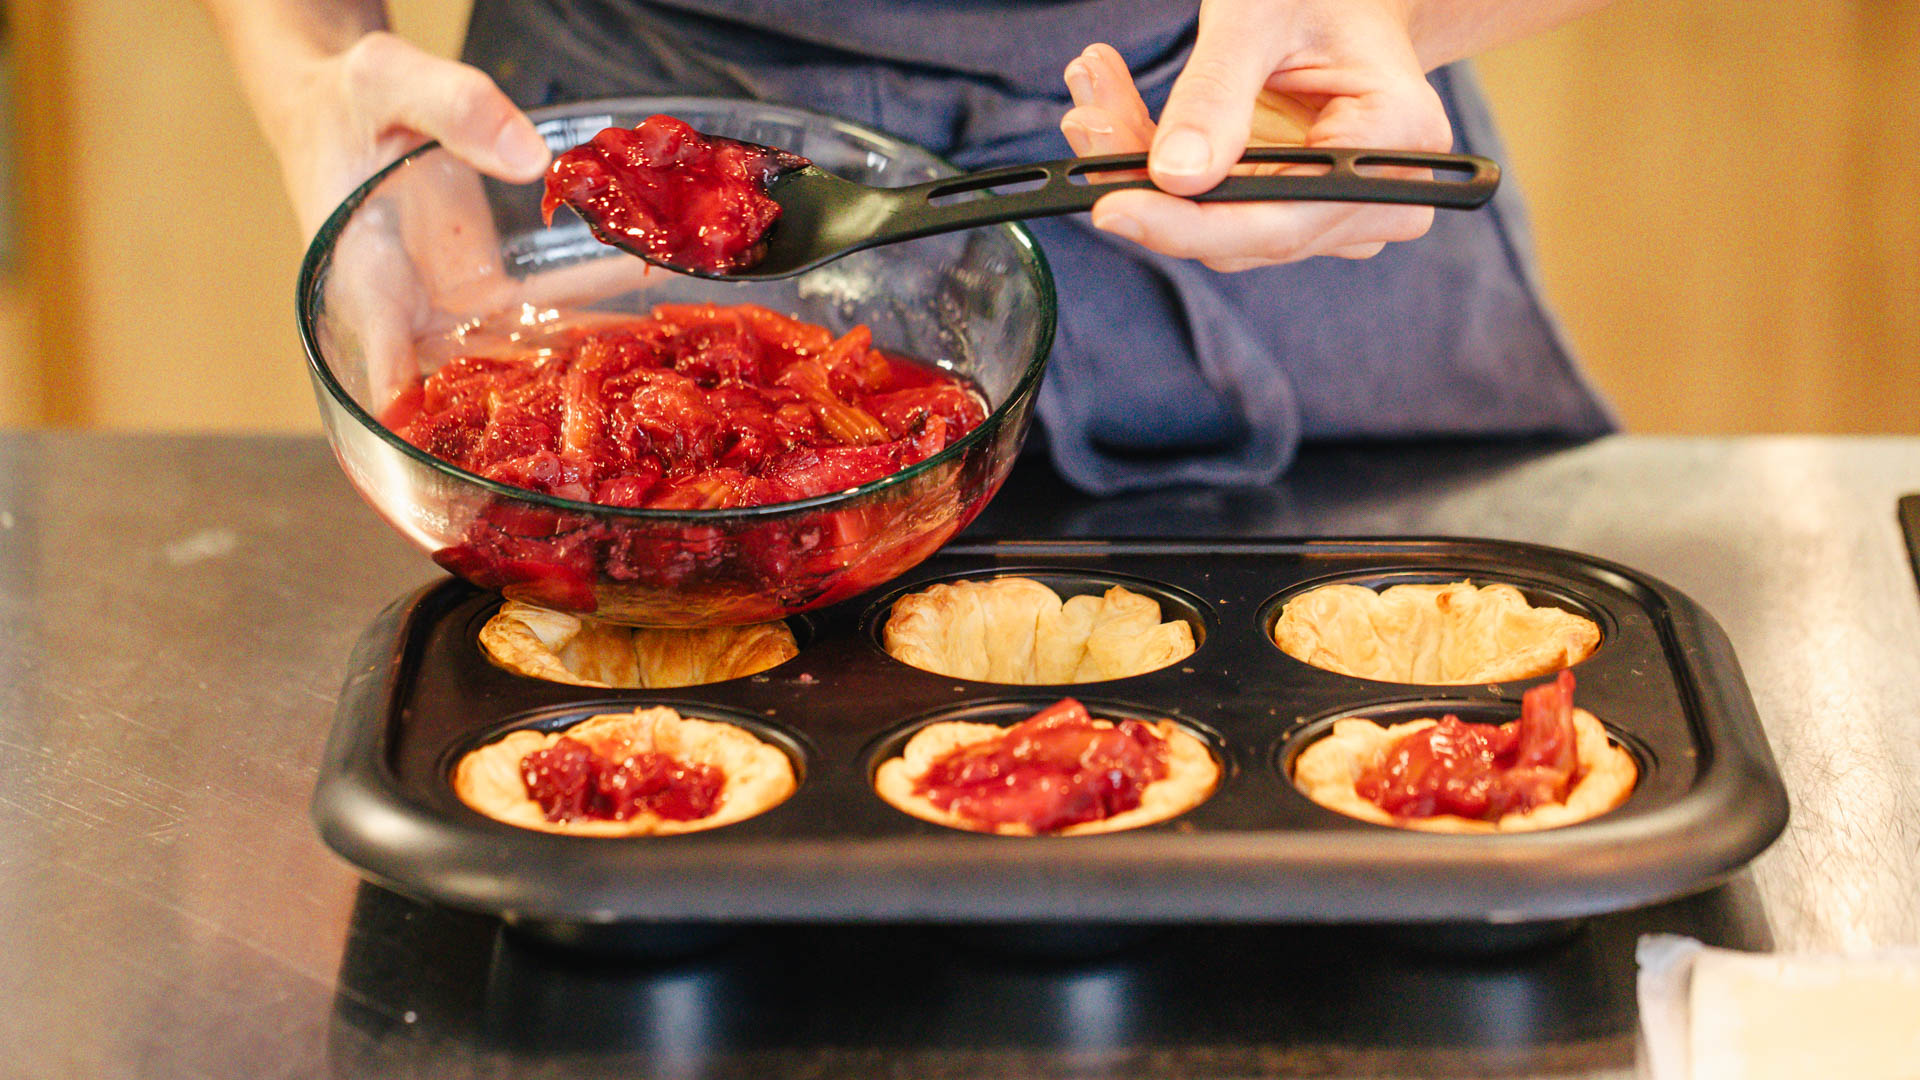
- Trim rhubarb and cut into 3cm pieces. Heat a saucepan over medium heat. Add rhubarb, sugar and vanilla. Cook, covered, for 8-10 minutes, stirring occasionally, to soften rhubarb. Remove from heat and allow rhubarb to cool.
- Preheat oven to 210ºC. Cut out 6 pastry rounds for the bases. Press into the base and up the sides of your pie tins. Use a fork to gently press holes into the base of the pastry. Place pie tins on a large oven tray and bake for 10-15 minutes until pastry is golden and cooked through.
- Remove pastry bases from oven and allow to cool for 5 minutes. Fill with rhubarb and set aside.
- Crack eggs into a bowl and whisk to make the egg wash.
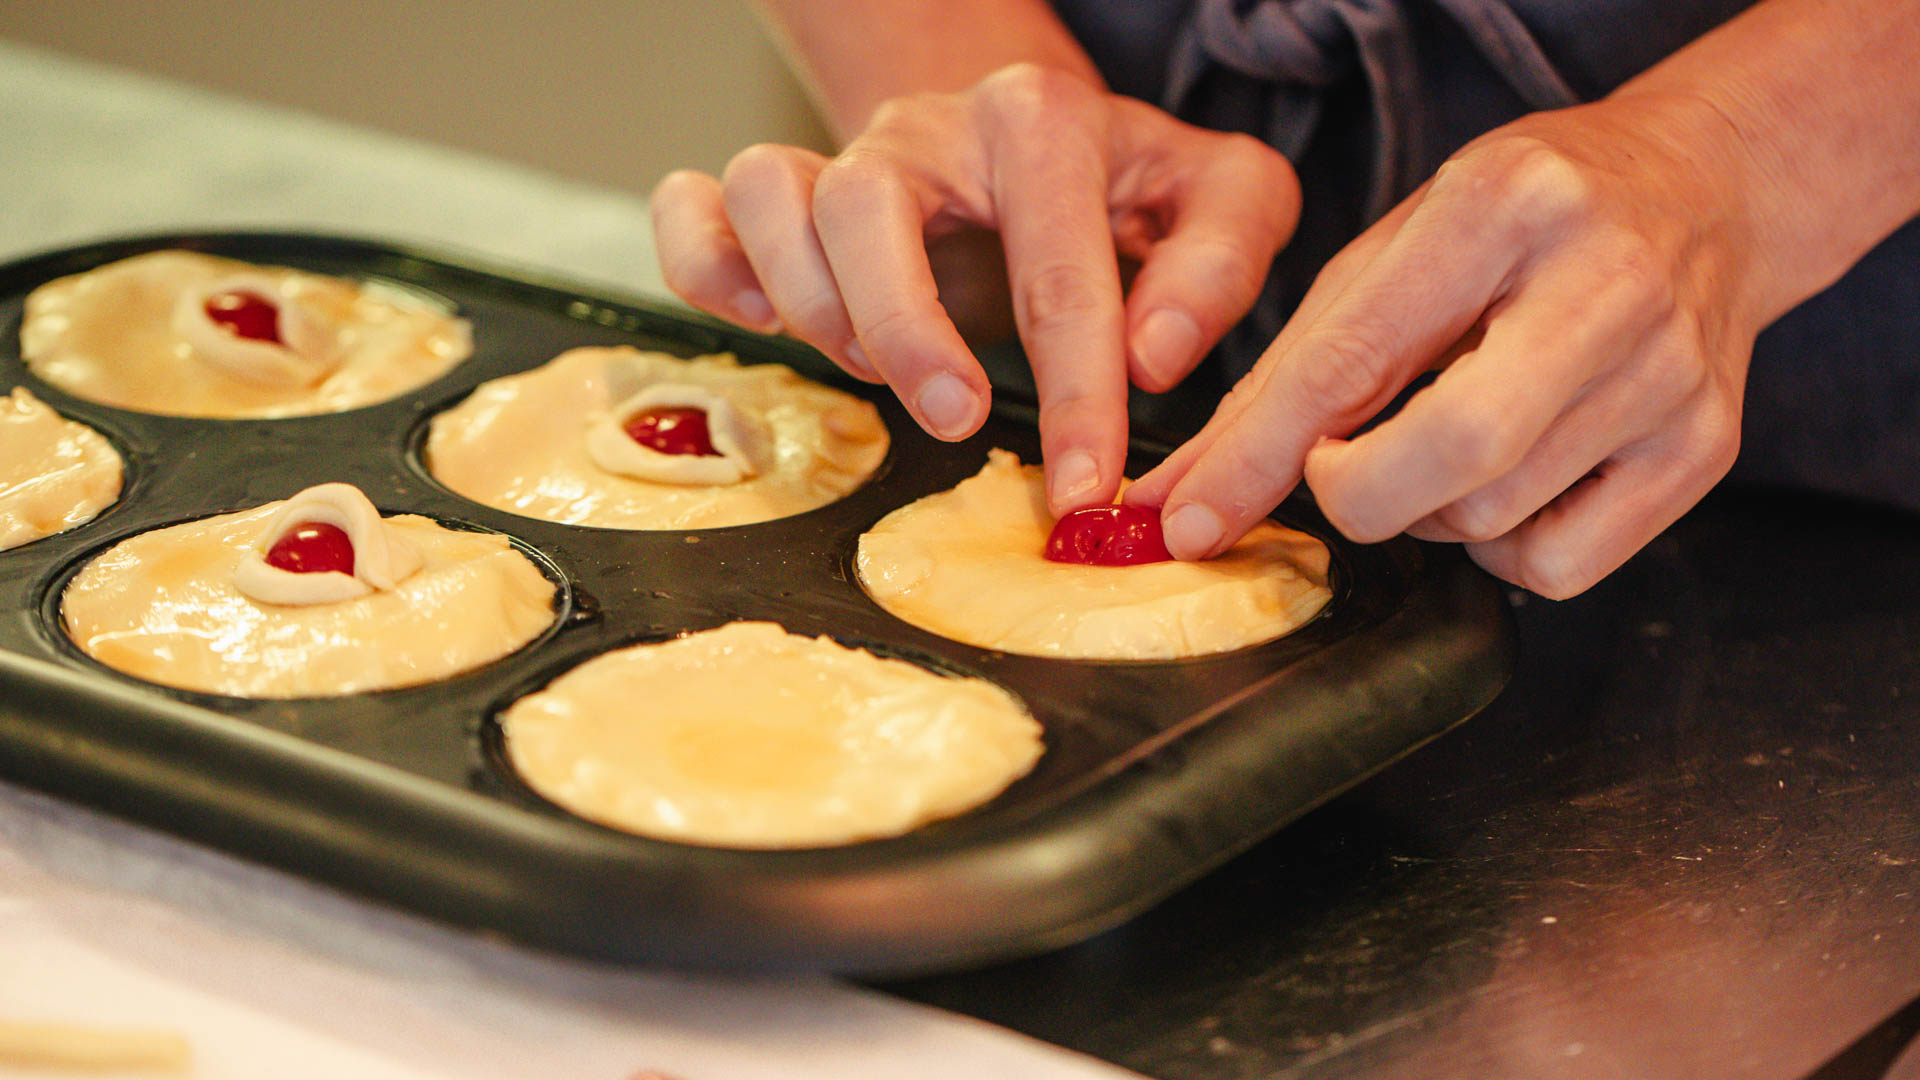
- Cut out 6 pastry rounds to make pie tops. Secure pie tops to bases by brushing with egg wash mixture.
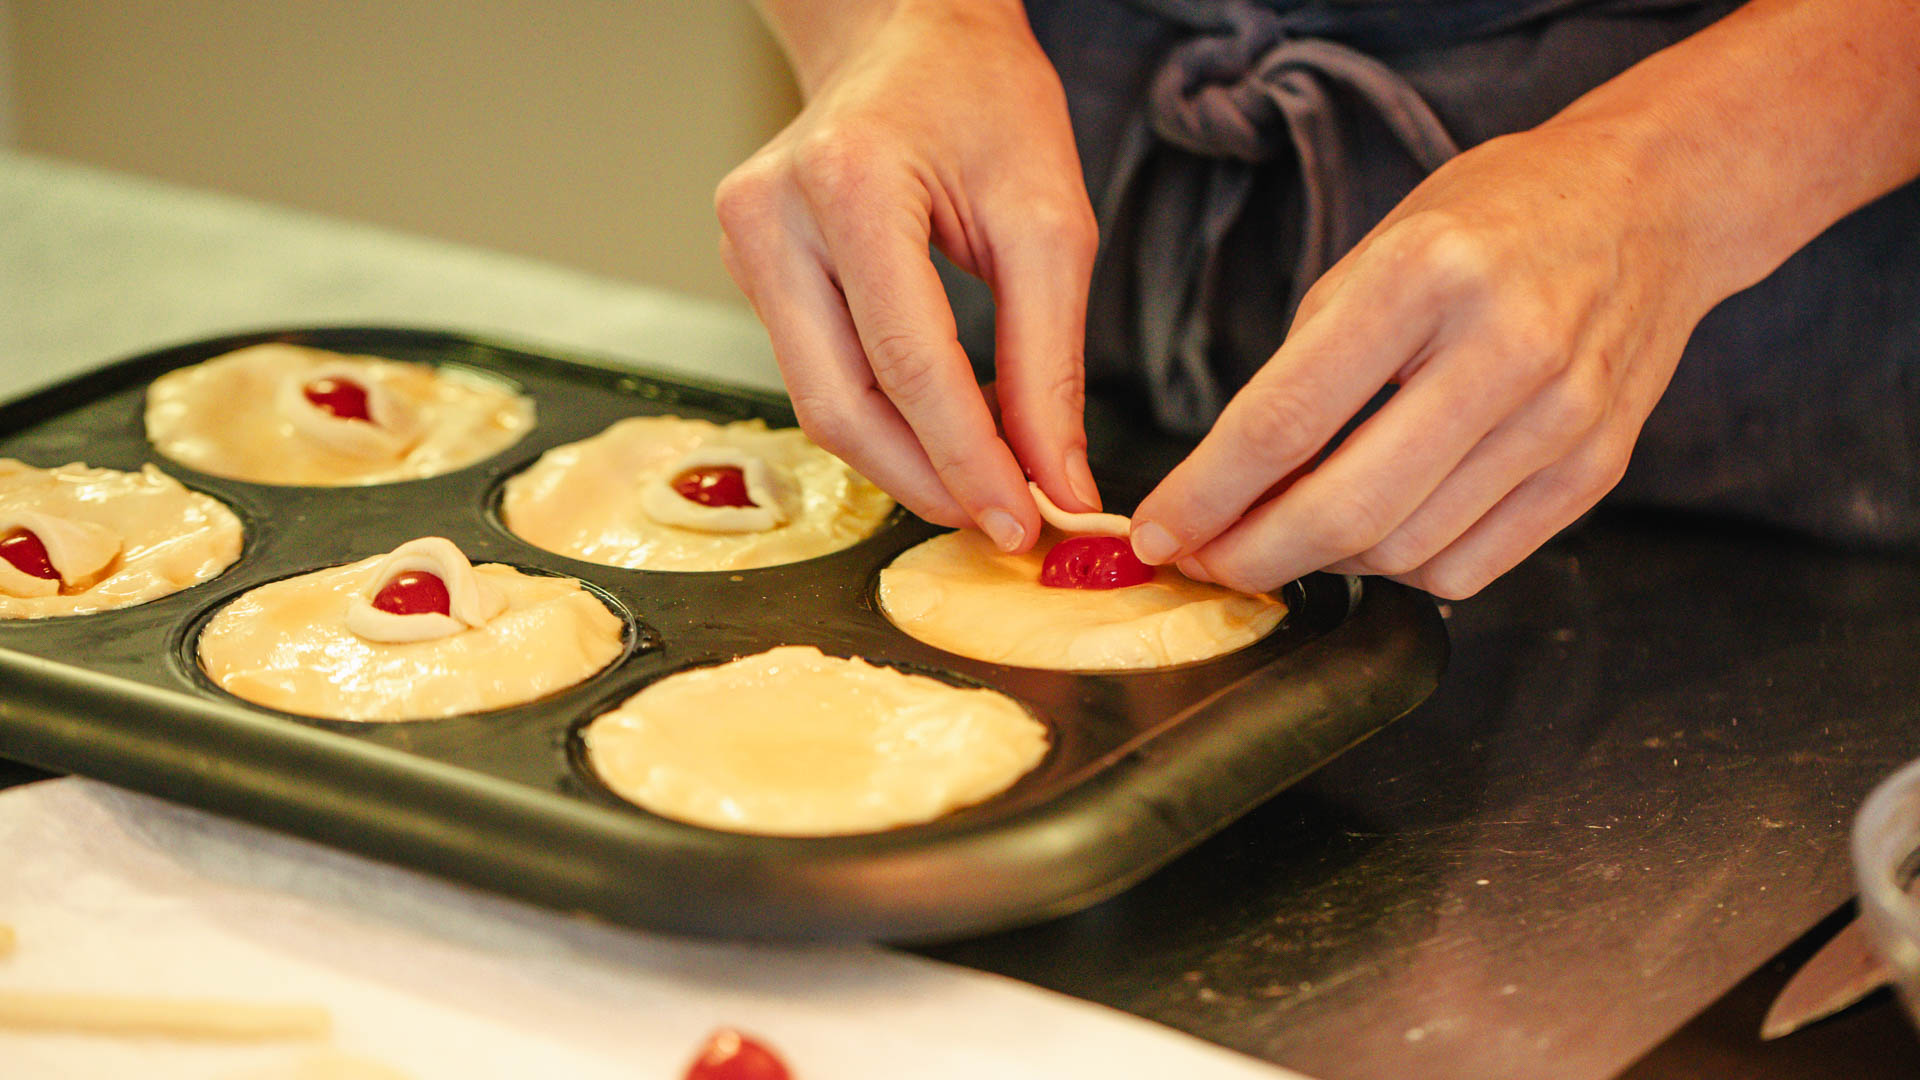
- Halve cherries and check their size. Cut out 6 small pastry semi-circles that are big enough to wrap around the cherry. Place cherry halves in the middle of the pie tops. Top with semi-circle eyelid and brush with egg wash. Cut small strips from remaining semi-circles to make lash-line pieces. Gently press into place and brush with egg wash.
- Return pies to oven and bake for 15 minutes until pie tops are golden.
- Once pies have cooled, draw a white line under the cherry eye and a tiny dot.
- Defrost pastry in the fridge and keep refrigerated until you are ready to use it (this will prevent is from going floppy and being difficult to use).
- We used a 6-hole muffin tray to make our pies.
- Use a cookie cutter or glass that is 1-2 cm wider than your pie tin as a size guide for how big your pastry base rounds should be.
- If your cherries vary in size, use the largest ones you have.
- You can use white food colour or white cake sprinkles to draw the details on the eye balls, or you can improvise like us, and use tiny pieces of cream cheese!